9 MORE HEADBANDS FOR CHARITY
I am thrilled to be writing this blog. When I
started designing, I’d decided that I’d put up one pattern for sale, and the
next one for free. I also decided that I would donate income made to some
charity.
When the world of blogging came along, I joined
that bandwagon, and decided to write patterns out for free here. Many of the patterns that I write out are not
my own patterns, but they’re all my notes as I work on the patterns there in.
The reason for my blog is simple – In India, we do not have as large a range of
locally available yarns, but do have a pretty large population of
crocheters. So my blog is just to
translate (literally) the way the pattern works out with our local yarns.
Now in this blog in particular, I am making
headbands for a local girls’ home – to give the girls something new for Diwali.
I thank my good friends +Prabha NC and +Anuradha for setting me on this path. Anuradha’s mum has been sewing dresses for
these young girls for years and I am honoured to be adding a little bit to that
gift.
Thank you for joining me.
In case you have just joined me, know that you can access all of my earlier creations by checking under ‘categories’ on the right hand side of this blog under “Labels”. Then, for your convenience, follow me here or on Facebook, You Tube, Pinterest, Twitter or Instagram.
Check out all my social media handles at the bottom of this blog
Oh, and may I add that the fastest way to find any of my blogs is via Pinterest.
All my blogs can be printed. Find the printer friendly (green) link at the bottom of this blog. You can also hit Control P (or Command P for Mac) on your keyboard, and the blog will go directly to the connected printer.
Remember that you only print if absolutely essential. Save paper – Save Our Earth.
Do remember to add my blog URL when you make and show off your creation.
Just copy the link on the search bar above - that's the blog URL.
To purchase this or similar yarn online, click here to buy your yarns online via Amazon. While you will still pay the same, I may get paid by Amazon as well.
This is a free blog - so do pay it forward for me. Cheers.
Most are free patterns and these notes
are only for any differences (if any) that I’ve made in the pattern, as well as
to give an estimate of the size that I’ve achieved (for those of us using
Indian yarns).
Materials used : Today I’ve
used our lovely Indian Oswal Cashmilon 4-ply acrylic yarn with a 4 mm crochet hook
In general : Use any yarn with a suitable hook to make these projects. The finer the yarn, the tinier the project.
International yarns : Among the international yarns I have used , I’d suggest Aunt Lydia Cotton 10, Aunt Lydia Bamboo-Viscose 10, DMC Petra, Sullivans knitting cotton (Australia), Milford Soft, Hilaza Rustica Eclat , Alize cotton yarn and Alize bamboo yarn.
Difficulty level
: Easy to Intermediate Skill level
Stitches used :
fdc : Foundation Double Crochet
: This is a unique way of starting a project directly with a row of double
crochet stitches. This makes your whole
project neat and even.. in a way that you need to do once, to agree! If you are familiar with fsc, you’ll wonder
why you never used this start before !
Chainless dc start :
Instead of the usual dc row start with ch 2 or ch 3, I’d like to introduce this
lovely new way of starting a dc row. Do take a look at this self explanatory
video at http://www.mooglyblog.com/chainless-starting-double-crochet/
In case you are unhappy with this
start, do continue with the usual ch 2 or ch 3 start. However, all instructions are given assuming
that you’re using this chainless dc start.
dc 3-tog : Double
crochet 3-tog : [yo, insert hk in st or ch-sp,
yo and pull up a lp ; yo and draw through 2 lps] 3 times (4 lps on hk) ; yo,
draw through all lps on hk. One dc 3-tog
made.
How to join
sides with single crochet : Check the links below :
How to join
sides with whip stich : Check the links below :
Abbreviations used : Using U.S Terminology
fsc : Foundation single crochet ch
: Chain
dc : Double crochet sp(s) : Space(s)
st(s) : Stitch(es) hk
: Hook
lp : Loop(s)
yo
: Yarn Over
sk : Skip
sc
: Single crochet
trc : Treble / triple crochet
Instructions : (Using U.S Terminology)
So before we set off on our new creative
journey, let’s take a quick look at what we’re creating here today.
These headbands are being made for young
children ages 5 – 15, so I’m going to make them a standard 19” circumference.
Working on the stretch of your yarn, as well as the tension of your work,
please vary as needed.
The first three patterns are really similar ..
with just a small change of pattern, we have three relatively different
headbands. Smart, huh?
Headband # 1
Start with
70 fsc (or an even number of fsc) which equals about 18”.
Join with a sl-st to the 1st st
ensuring that you keep the fsc chain flat.
Round 1 : hdc
in the 1st fsc ; (ch 1, sk next fsc ; hdc in the next fsc) ; rep
(to) all around ; ch 1, and join with a sl-st to the 1st hdc.
Round 2 : sl-st
into the 1st ch-1 sp ; hdc in the same ch-1 sp ; (ch 1, hdc
in the next ch-1 sp) ; rep (to) all around ; ch 1, and join with a sl-st to the
1st hdc.
Rounds 3 - 5 : Rep
Round 2.
Round 6 : sc
in the 1st hdc ; (sc in the next ch-1 sp ; sc in the next hdc) ; rep
(to) all around and join with a sl-st to the 1st sc.
Fasten off and weave in ends.
Total width : 1.75”
Total length /circumference : 18”
Headband # 2
Start with
70 fsc (or an even number of fsc) which equals about 18”.
Join with a sl-st to the 1st st
ensuring that you keep the fsc chain flat.
Round 1 : hdc
in the 1st fsc and in each fsc till end. Join with a sl-st to the 1st
hdc.
Round 2 : hdc
in the 1st hdc ; (ch 1, sk next hdc, hdc in the next hdc) ;
rep (to) all around ; ch 1, and join with a
sl-st to the 1st hdc.
Rounds 3 & 4 : sl-st
into the 1st ch-1 sp ; hdc in the same ch-1 sp ; (ch 1, hdc
in the next ch-1 sp) ; rep (to) all around ; ch 1, and join with a sl-st to the
1st hdc.
Rounds 5 : hdc
in the 1st hdc ; (hdc in the next ch-1 sp ; hdc in the next hdc) ;
rep (to) all around ; ch 1, and join with a
sl-st to the 1st hdc.
Round 6 : sc
in the 1st hdc ; (sc in the next ch-1 sp ; sc in the next hdc) ; rep
(to) all around and join with a sl-st to the 1st sc.
Fasten off and weave in ends.
For the cute little
flower embellishment, this is a small variation on the existing
patterns.
Start with
a 16 fsc (or multiples of 3 + 1). Turn.
Row 1 : sk
1st fsc ; (sc ; hdc ; 3 dc ; hdc ; sc) all in the next fsc ; *sk
next fsc and work (to) in the next fsc* ; rep *to* till end. Fasten off leaving a long tail to attach your
flower.
Flower
finishing : You have a
row of little petals for the flower. We
will now roll up our flower petals from the end, such that the long tail is
exposed and can be used to stitch the base of our flower petals together.
Total width : 2”
Total length /circumference : 18”
Headband # 3
Start with
70 fsc (or an even number of fsc) which equals about 18”.
Join with a sl-st to the 1st st
ensuring that you keep the fsc chain flat.
Round 1 : hdc
in the 1st fsc and in each fsc till end. Join with a sl-st to the 1st
hdc.
Round 2 : hdc
in the 1st hdc ; (ch 1, sk next hdc, hdc in the next hdc) ;
rep (to) all around ; ch 1, and join with a
sl-st to the 1st hdc.
Round 3 : hdc
in the 1st hdc ; (hdc in the next ch-1 sp ; hdc in the next hdc) ;
rep (to) till end. Join with a sl-st to the 1st hdc.
Rounds 4 : Rep Round 2
Rounds 5 : Rep
Round 3.
Round 6 : sc
in the 1st hdc ; (sc in the next ch-1 sp ; sc in the next hdc) ; rep
(to) all around and join with a sl-st to the 1st sc.
Fasten off and weave in ends.
For the cute little
flower embellishment, use the above two ideas.
Total width : 2”
Total length /circumference : 18”
Headband # 4
I’ve had made a shelled headband earlier, and I
am going to tweak that just a bit to get a different size here.
Total width : 2.9”
Start with a 72 fsc,
(or in multiples of 6, that will go around the head of the little girl you’re
making this for). Keeping the chain
flat, join the two ends of your fsc chain to make a round.
Round 1 : sc in the 1st
fsc ; *sk the next 2 fsc , 7 dc in the
next fsc ; sk the next 2 fsc, sc in the next fsc* ; rep *to* all around and
join with a sl-st to the 1st sc.
We will now work on the other side of the
same fsc start chain, and we will be working 7 dc in the same fsc that
we’ve worked in for this 1st side.
So basically rep Round 1, but on the other
side of the fsc chain.
Fasten off and weave in ends.
Total width : 1”
Total length /circumference : 18”
For the cute little
flower embellishment, we will work a set of stitches to make up each
petal, directly into the magic circle.
Start with
a magic circle ; (sc , hdc , 2 dc , hdc , sc) in the magic circle ; rep (to) 4
times and join with a sl-st to the 1st st. Fasten off and leave a tail to join to
headband or project in hand.
Headband # 5
For the headband, I’ve used the same pattern as
for Headband # 4. I’ve changed the
little flower embellishment here.
So. It’s the same basic magic circle , using two
colours, so that we get a centre for the flower, and can have petals in a
different color, is as follows.
Start (with
Colour 1 )
: with a magic circle ; and work 5 sc in the magic circle.
Fasten off Color 1, and join Color 2 for the petals.
Round 1
(with Colour 2 ) : (sc , hdc , 2 dc , hdc , sc) in the 1st
sc ; rep (to) 4 times in each sc all around and join with a sl-st to the 1st
st. Fasten off and leave a tail to join
to headband or project in hand.
Total width : 1”
Total length /circumference : 18”
Headband # 6
For this headband, I’ve been inspired by a
photograph of a knitted creation. I am
not sure if there is a crochet version, but here’s what I’ve done.
So for this creation, we will work from one end
of our headband to the other in a straight line, side to side, and then we’ll
add a button hole on one end, and a button at the other to join it all up.
So there’s going to be a flat portion on either
end of our headband and lovely chains that go across the head for the centre of
the headband. Got it?
This pattern has no stitch count repeat. You will make your first chain as long as you
need to get around the head of the child you’re making this for.
Start with
as many fsc as needed to go neatly around the head of the child.
Turn.
Note : Remember
that depending on the stretch of your yarn, and your stitch tension, you will
get more length on continued use, so I’d suggest you work a little less
than the actual measurement needed.
However also
remember that you are going to put your button a little away from the end,
which means that you will have a little less circumference.
OK.. now here’s the next calculation. We will be leaving 10 sts on both ends and
working just chains in between these two ends (see photograph).
So this means that say you have started with 70 fsc ; you will work sc in the 1st
10 fsc ; work a length of 50 ch and then work in the last 10 fsc to get a total
of 70 sts each time. Got it?
As each of us are probably working with a
different number of start stitches, I will just say work a chain length
in the instructions below.
Row 1 : sc
in the 1st 10 fsc ; work a
chain length ; sc in the last 10 fsc.
Turn.
Row 2 : sc
in the 1st 10 sc ; work a
chain length ; sc in the last 10 sc.
Turn.
I’ve decided to work only 5 rows, so Row 3 will
be my centre row and that’s where I need to get my button hole in.
You need to decide how large a button you’re
going to use and also calculate how many stitches are needed to accommodate
your button.
I am assuming that skipping 3 stitches
will suffice, but please work according to your button size and gauge.
Row 3 : sc
in the 1st 10 sc ; work a
chain length ; sc in the next 4 sc ; ch 3, sk next 3 sc ; sc in each sc till
end. Turn
Row 4 : sc
in the 1st 10 sc ; work a
chain length ; sc in the next 4 sc ; 3 sc in the next ch-3 sp ; sc in each sc
till end. Turn
Row 5 : sc
in the 1st 10 sc ; work a
chain length ; sc in the last 10 sc.
Turn.
Fasten off and weave in ends.
Attach your button on one end, and you’re done !
Ain’t this just the cutest little creation?!
Total width : 1”
Total length : 18”
Headband # 7
For this headband, I’ve used this freebie from
As per pattern, I started with 66 fsc, and had a
chain length of about 17.5”. I did only
one repeat of the puff stitch, and then worked 2 rounds of sc to finish.
Total width : 1.75”
Total length : 18” (I worked till I had 18” to
suit the size I’m working on presently)
Headband # 8
For this headband, I’ve used this freebie from
Enjoyed this ?? I sure did.. come back right
here for more freebie patterns
If you're visiting me here for the first time,
and have liked the experience, do add me to your mailing list (for your
convenience) , and all my future free patterns will come straight to your mail
box.
I’d appreciate if you could credit my blog (and
link the original pattern link) when you make your own creations. Thanks.
Have a great day and see you soon.
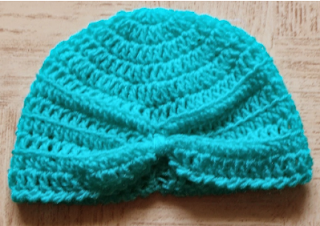
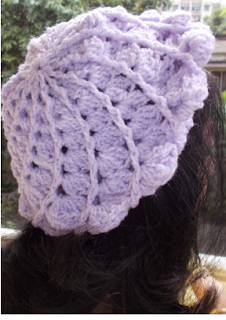
I have a few headwear projects already made, and just
in case you want a dekho at those free patterns … here you go














No comments:
Post a Comment
Thanks for taking the time to stop by. Do tell me what you think. Cheers