This is a long story.. but the short version is
that I heard of a Rotary Charity - The National Burns Centre, Airoli, in Navi Mumbai, India, and I
hope to make several little things to donate, and these headbands are just one
in that list of donations.
If interested in seeing how you can help, no matter where you live in the world, please visit their webpage and see how you can help. Thank you.
Did you know that for a skin donation, there is NO age, sex or color bar? Pledge your skin today and help someone have a better future, even after you've passed on!
Did you know that for a skin donation, there is NO age, sex or color bar? Pledge your skin today and help someone have a better future, even after you've passed on!
What a beautiful way to go, isn't it?
Thank you for joining me.
In case you have just joined me, know that you can access all of my earlier creations by checking under ‘categories’ on the right hand side of this blog under “Labels”.
Then, for your convenience, follow me here or on Facebook, You Tube, Pinterest, Twitter or Instagram. Check out all my social media handles at the bottom of this blog
Oh, and may I add that the fastest way to find any of my blogs is via Pinterest.
Do remember to add my blog URL when you make and show off your creation. Cheers. Enjoy
To purchase this or similar yarn online, click on the link at the top right of this blog that reads click here to buy your yarns online via Amazon. While you will still pay the same, I may get paid by Amazon as well. This is a free blog - so do pay it forward for me. Cheers.
Do check my Pinterest “to-do” link for other
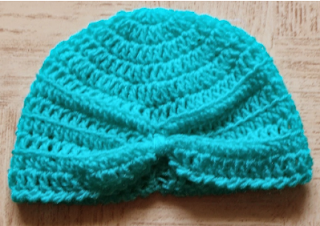
headwear here
Thanks for joining me once again as we work on
and discover these patterns together. Most are free patterns and these notes
are only for any differences (if any) that I’ve made in the pattern, as well as
to give an estimate of the size that I’ve achieved (for those of us using
Indian yarns).
Materials used : Today I’ve
used our lovely Indian Oswal Cashmilon 4-ply acrylic yarn with a 4 mm crochet
hook ; embroidery needle to sew
Difficulty level
: Easy to Intermediate Skill level
Stitches used :
Starting slip knot : https://youtu.be/lJcqsVcs8cw
Starting slip knot 1 or the Sloppy Slip knot : https://youtu.be/YfC7KmGpifs
Foundation Single Crochet : fsc : https://youtu.be/mcT85fwh4mA
Magic circle : https://youtu.be/ISC39yOqWro
Single Crochet : Sc : yo, insert hk into st ; yo (2 lps on hk); yo, draw through both lps. One sc made. Check out the video at https://youtu.be/ghACqBpA-3k
First stitch for Single Crochet : https://youtu.be/6pVYRfsf4_M
Half Double Crochet : Hdc : yo, insert hk into st ; yo (3 lps on hk) ;
yo, draw through all 3 lps. One hdc made.
Check out the video at https://youtu.be/sDiELJdB2Dg
Chainless start for Half Double Crochet : I dislike the ch-2 start, and this is what I do to start my row of hdc. Check out the video at https://youtu.be/lWXpl1KdbZ8
What is a slip stitch : https://youtu.be/weB3QNbA8Iw
Double Crochet : dc : yo, insert hk into st ; yo (3 lps on hk);
[yo, draw through 2 lps] twice. One dc made.
Check out the video at https://youtu.be/xdnjB27zpYo
Chainless start for Double Crochet : I dislike the ch-2 / ch – 3 start, and this is what I do to start my row of dc.
Check out the video at https://youtu.be/wskv3iTjRx0
Abbreviations used : (Using U.S terminology)
lp(s) : Loop(s) sc : Single crochet
dc : Double crochet sp : Space
sl-st : Slip stitch ch : Chain
st(s) : Stitch(es) hk : Hook
yo : Yarn Over
Instructions using U.S terminology
Please note that I start all my rows with a ch 1, turning chain for ease.
Please check the top of this blog for easy video tutorials on all stitches used in today's pattern.
Please read through all my notes before you pick up your hook, so you know just where we're heading in our pattern.
I am going to make a few headbands – some are my
own patterns, and the rest are free patterns.
My notes here are mainly for the size achieved (using locally available
Indian yarns) and /or any changes made.
HEADBAND # 1
I’ve made a shelled headband and it’s my original simple
pattern
Total width : 2.9”
Start with a fsc
chain, in multiples of 3, that will go around the head of the little girl
you’re making this for. Keeping the
chain flat, join the two ends of your fsc chain to make a round.
Round 1 : sc in the 1st
fsc ; *sk the next 2 fsc , 5 dc in the next fsc ; sk the next 2 fsc, sc in the
next fsc* ; rep *to* all around and join with a sl-st to the 1st sc.
Round 2 : 3 dc in the
1st sc ; *sk the next 2 dc , sc in the next dc ; sk the next 2 dc, 5
dc in the next sc* ; rep *to* all around till the last st ; 2 dc in the same
1st st that you started with and join with a sl-st to the 1st
dc.
Round 3 : sc in the 1st
dc ; * sk the next 2 dc, 5 dc in the next sc ; sk the next 2 dc , sc in the
next dc* ; rep *to* all around and join with a sl-st to the 1st st.
You could rep Rounds 2 and 3 once more OR you
could fasten off and weave in ends.
For the second part of our headband, we will
work on the other side of the fsc chain – so re-attach your yarn at the 1st
fsc, on the other side.
We will now work Rounds 1 – 3 (or 5) on the other side of the fsc ch.
We will now work Rounds 1 – 3 (or 5) on the other side of the fsc ch.
You will work the sc in the sc of the other side
of the fsc ch ; and the 5 dc in the same fsc on the other side of the ch too.
Fasten off and weave in ends.
HEADBAND # 2
This is the headband I’ve used the same pattern
above, but made with working Rounds 1 – 3 on both sides of the fsc chain.
Total width : 2”
This is the headband I’ve made with working just
Rounds 1 – 2 on both sides of the fsc chain.
For the next few hairbands, I’ve used free
patterns with small changes for myself.
I’ve made a note here of whatever I’ve changed – so have fun and create.
HEADBAND # 3
For this
pattern, I’ve used the lovely freebie here
This
stitch is also known as the Camel Stitch and it gives a knit-like effect. This stitch can only be worked on the right
hand side of work, hence this headband is worked in the round.
Total
width : 2”
HEADBAND # 4
Get this free
pattern here
For this
pattern, the designer has worked in rows.
I however, decided to work in a round.
I started with a fsc chain and joined the two ends. I then worked the pattern with one st in back
loop and the next in the front loop as directed. However, as I was working in rows, I just
followed instructions and turned to work anyway – to get the pattern per
designer.
Total
width : 2”
HEADBAND # 5
Get this free
pattern here
This
pattern is worked up and down in a strip-like piece that then folds to become a
headband. The fantastic cabled effect is
thanks to the use of post stitches. I’d
put this one down as an Intermediate skill level mainly due to the post
stitches.
Total
width : 2.7”
HEADBAND # 6
Get this free
pattern here
I reduced
the number of start stitches (by just 2) to keep it a little less wide. In this pattern, we work up and down the width
of our project and the number of repeats determines the length of the
headband. Though the designer has given
a set number of stitches and rows, you can make this with any yarn thickness by
ensuring that you just get the round head measure you need.
Total
width : 2.2”
HEADBAND # 7
Get this pattern here
For this
pattern, we start with one end of the headband (in a pointy triangle start) and
continue along the length of the headband to finish with a little triangle at
the other end.
Total
width : 2.4”
HEADBAND # 8
Get this free
pattern here
This is a really cute and simple pattern. I reduced the number of repeats that
determines the width of our headband. Then I played with the number of dc in the
shelled scalloped edge. As you can see, neither of my changes affects the
pattern, and the end result is as good.
Total width : 2.5”
HEADBAND # 9
Get this free
pattern here
For this pattern, I started with a fsc chain and with an even number of stitches needed for the round head
circumference of the child. I worked as
many rounds as I needed to get the width of the headband. As I’ve used this pattern for a headband (and
not an ear warmer), I have done a thinner width.
Total width : 2”
HEADBAND # 10
Get this free
pattern here
Yet again
as I’m making a headband, (as against an ear warmer), I’ve worked a much
thinner headband. For this, I just
reduced the start stitches (started with 5 fsc)
Total width : 2.75”
HEADBAND # 11
Get this free
pattern here
For this
pattern, I’ve started with an fsc chain, but that’s mainly because of my
preference for it – not for a change in pattern.
Total width : 2.5”
HEADBAND # 12
Get this free pattern here
For this pattern, I started with 95 fsc and got a length
of about 27”. I worked in two colours
and only 3 rows, mainly as the colors worked out that way. I achieved a width of 1.25” per strip.
Total width : ~ 3”
Total length : ~ 21”
HEADBAND # 13
Get this free pattern here
I *think* there is a typo on this pattern. The 1st line says that you start
with as many stitches as you need to go around your head, but you will actually
start with twice as many stitches as you are
basically making this one long strip and then looping it around your head. Halfway down, it does say that this makes
half your width, but I think that
should read length.
I started with foundation hdc and then worked hdc in each
hdc till end.
If using this pattern, may I suggest you use the general
head size chart given at the top of this blog to estimate how many inches you’d
need for different ages. Also remember
that each yarn has a different stretch, so work that in when calculating number
of stitches.
I worked till I had a strip that was about 1.5” wide, as
that would make 3” when doubled and complete.
HEADBAND # 14
Get this free pattern here
For this pattern, I started with 16 fdc and got a width of
about 3.75”. For a “how to” on fdc,
check the top of this blog.
IF you decide to start with the fdc, you will ignore Row 1, and work Row 2 with the post stitches. The rep
rows will still be Rows 2 & 3 , ending with a
Row 3.
I’ve worked as many rows as required by the pattern, just
to see how long ad wide this one turns out, and then I can change number of
stitches and rows if needed for future.
Total width : ~ 3.75”
Total length : ~ 21”
HEADBAND # 15
Get this free pattern here
Stunningly simple pattern, but looks
great mainly due to the change in colors.
As the designer says, it doesn’t matter how the color ends are woven, as
we wrap them up all neatly in the band eventually. Do check the many links for changing of
colours at the top of this blog.
Total width of headband : ~ 3.5” ;
Total width of centre band : ~ 2.5”
Total length of headband : ~ 20”
HEADBAND # 16
Get this free pattern here
The designer has given a beautiful
pattern repeat of multiples of 3, which makes this pattern diverse. You can make it for any size head.. so yaay
For my project, I’ve decided to work
in a round, rather than attach the tie strings at each end. As I’ve decided to work in a round, there are
a few changes in the pattern that I’ve worked, so here are my notes.
Start with fsc in
multiples of 3. Join with a sl-st to the
1st fsc and make a round.
Round
1 : sc in the 1st fsc ; ch 3, puff st in the
same 1st st, *sk next 2 fsc ; sc in the next fsc, ch 3, puff st in
the same fsc* ; rep *to*
till end and join with a sl-st to the 1st sc.
Round
2 : sl-st into the 1st ch-3 sp ; sc in the
same 1st ch-3 sp ; *ch 2, sc in the next ch-3 sp* ; rep *to* all
around and join with a sl-st to the 1st sc.
Round
3 : sc in the 1st sc ; ch 3, puff st in the
same 1st sc, *sc in the next sc, ch 3, puff st in the same sc* ; rep *to* till end and join
with a sl-st to the 1st sc.
Rep Rounds 2 & 3 till your
headband is the width needed.
Last
Round : sc in the 1st sc ; 2 sc
in the next ch-2 sp ; *sc in the next sc ; 2 sc in the next ch-2 sp* ; rep *to*
all around and join with a sl-st to the 1st sc. Fasten off and weave in ends.
Total width : ~ 2.5”
Total length : ~ 20”
So with this link, you have two sets
of ideas for two totally different headbands with one similar pattern.. Neat
huh?
HEADBAND # 17
Get this free pattern here
DO check her blog
for her awesome booties and shoes too.
I’ve started with my preferred fsc,
and so have started with 7 fsc. You
could start with any
uneven number of stitches for this pattern,
depending on how wide you want your
headband.
I love the addition of an elastic at
the end – which is perfect as you start with one straight-ish edge and one
which is neat and pointed. What you
could also do is flaut that pointed arrowed edge by bringing it
around the front and snapping on a button onto that edge. This way, though, it will be a fixed (of
sorts) sized headband – the stretch of your yarn deciding how many head sizes
one pattern can fit, if you get what I mean.
IF you decide to snap on a button, I’d suggest you make your headband a
little wide – as buttons and wide bands usually work well.
Total width : ~ 2.5”
Total length : ~ 20”
HEADBAND # 18
Get this free pattern here
Oh!! This is great! This wonderful
designer has also take the idea from Whistle&Ivy and has added on her spin
with the flowers.. just as I have added my spin with the button on the link
just above!
Aren’t the flowers beautiful!
So for the pattern here, I’ve worked
again, with my preferred start with fsc and then followed through with the
flowers. The designer here has worked in the back loops (sc blo) every 4th
row – and I decided to see how it would look if I worked sc-blo every other row. This means that along the back (wrong) side,
I worked in each sc, and along the front (right) side, I worked the sc-blo.
Total width : ~ 2.5”
Total length : ~ 20”
HEADBAND # 19
Get this free pattern here
I started with my preferred fsc, and worked in multiples
of 4. We will be working up and down
along the width of the headband.
Total width : ~ 3”
Total length : ~ 19.5”
HEADBAND # 20
Get this free pattern here
For the beauty of this pattern to show through, may I
suggest that you use a slightly thicker yarn – like Vardhaman Millennium
DK. The ‘bead stitch’ that the designer
has used here forms a cute little bump that shows through better in a thicker
ply yarn.
Total width : ~ 3”
Total length : ~ 20”
HEADBAND # 21
Get this free pattern here
Total width : ~ 3”
Total length : ~ 19.5”
Enjoyed this ?? I sure did.. come back right
here for more freebie patterns
If you're visiting me here for the first time, and have liked the experience, do add me to your mailing list (for your convenience) , and all my future free patterns will come straight to your mail box.
I’d appreciate if you could credit my blog (and link the original pattern link) when you make your own creation. Thanks.
Check out my awesome pins on Pinterest at https://in.pinterest.com/shyamanivas/
OR just my free patterns at https://in.pinterest.com/shyamanivas/free-patterns-made-by-me/
Join me on YouTube at http://youtube.com/shyamanivas
And on my Facebook page at https://www.facebook.com/Sweet-Nothings-Crochet/ for more patterns.
Do follow me on Twitter https://twitter.com/ShyamaNivas
Do follow me on Instagram https://www.instagram.com/sweetnothingscrochet/
Have a great day and see you soon.
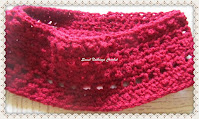
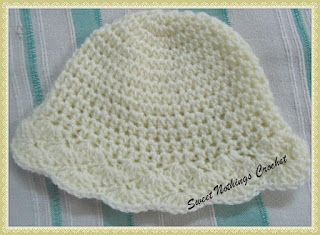
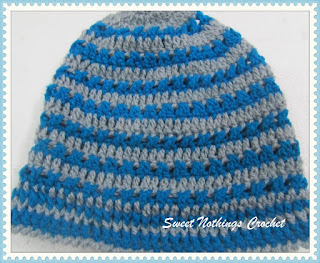
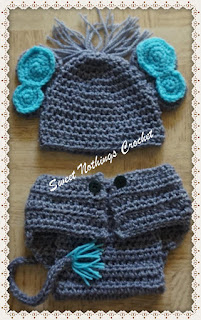
I have a few projects already made, and just
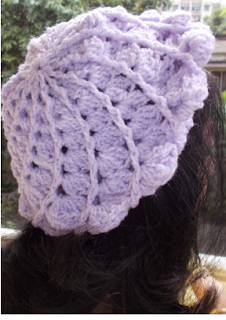
in case you want a dekho at those free patterns … here you go














No comments:
Post a Comment
Thanks for taking the time to stop by. Do tell me what you think. Cheers