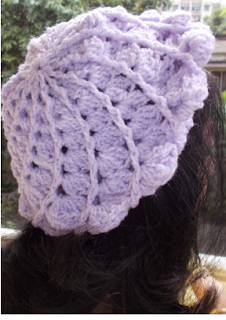
ONE SKEIN SUPER HAT # 1
I was gifted this lovely Red Heart Super Saver
Worsted weight yarn recently and thought that this would make just the perfect
gift for the wonderful lady who has gifted me this yarn.
There are a set of hats that I am going to
attempt and this is one more in that line – so look out for other such projects…
and oh, this is a single skein project!
Thank you for joining me.
In case you have just joined me, know that you can access all of my earlier creations by checking under ‘categories’ on the right hand side of this blog under “Labels”.
Then, for your convenience, follow me here or on Facebook, You Tube, Pinterest, Twitter or Instagram. Check out all my social media handles at the bottom of this blog
Oh, and may I add that the fastest way to find any of my blogs is via Pinterest.
Do remember to add my blog URL when you make and show off your creation. Cheers. Enjoy
To purchase this or similar yarn online, click on the link at the top right of this blog that reads click here to buy your yarns online via Amazon. While you will still pay the same, I may get paid by Amazon as well. This is a free blog - so do pay it forward for me. Cheers.
I am super excited starting on this project, so
thanks for joining me on this journey as well.
I had a pretty hard time finding just the right
pattern for this – and have now decided on free pattern at http://www.hopefulhoney.com/2015/03/1920s-pompom-cloche-hat-crochet-pattern.html
I’ve made a few small
changes.. and here are my notes for those changes.
Materials used : Today I’ve
used a one skein of Red Heart Super Saver (4) Worsted weight acrylic with a 5
mm crochet hook
For Indians : This yarn
is thicker than our Indian Vardhaman Millennium acrylic yarn, so I’d say to get
this thickness, you can work one skein of Vardhaman Millennium and one of our
Cashmilon 4-ply acrylics held together.
That said, I think this pattern will look superb in just Vardhaman Millennium
and a 4.5 / 5 mmmm crochet hook.
Difficulty level
: Easy to Intermediate Skill level.
Stitches used :
Starting slip knot : Here’s how you start with a slip knot. https://youtu.be/lJcqsVcs8cw
Starting slip knot 1 or the Sloppy Slip knot : This is a neat new way to start your work without a slip knot. https://youtu.be/YfC7KmGpifs
What is a chain stitch ? Here is an easy video tutorial https://www.youtube.com/watch?v=pXx5ukBjKkY
What is a slip stitch : Here is a neat video tutorial at https://youtu.be/weB3QNbA8Iw
Magic circle : To refresh your skill, please view this easy video https://youtu.be/ISC39yOqWro
Single Crochet : Sc : yo, insert hk into st ; yo (2 lps on hk); yo, draw through both lps. One sc made. Check out the video at https://youtu.be/ghACqBpA-3k
First stitch for Single Crochet : This is how I like to start my row of sc. Check out the video at https://youtu.be/6pVYRfsf4_M
Double Crochet : dc : yo, insert hk into st ; yo (3 lps on hk);
[yo, draw through 2 lps] twice. One dc made.
Check out the video at https://youtu.be/xdnjB27zpYo
Chainless start for Double Crochet : I dislike the ch-2 / ch – 3 start, and this is what I do to start my row of dc.
Check out the video at https://youtu.be/wskv3iTjRx0
Abbreviations used :
lp(s) : Loop(s) sc : Single crochet
dc : Double crochet sp : Space
sl-st : Slip stitch ch : Chain
st(s) : Stitch(es) hk : Hook
yo : Yarn Over
Instructions : (Using U.S terminology)
Please note that I start all my rows with a ch 1, turning chain for ease.
Please check the top of this blog for easy video tutorials on all stitches used in today's pattern.
Please read through all my notes before you pick up your hook, so you know just where we're heading in our pattern.
In my patterns I work with the principle of stitch count and body measurement. This means that you need to work the stitch count in pattern, till you get the measurement (length and/or width) that you need for your project.
For head wear, I advise that you make the beret / beanie about an inch smaller than intended, keeping in mind the stretch of your yarn.
Check the head measurement charts at the top of this blog, and read the information below as well before you start working.
1. Hat circumference = measure around the head just above ears and subtract one inch for a nicely fitted finished hat.
2. Crown width = (this is a flat circular top of the hat) you need to divide hat circumference by 3.14 (pi).
3. Hat height = Head circumference / 10 x 4.
So you need to measure circumference of the head (round head measurement) and keep checking the outer circumference of your work.
There is another trick for measuring circumference (without running your measure tape all around the edge of your circle as you are working).
This works for a cap that you are working top down, from the crown of the head.
It works by dividing your round head measure by pi (3.14).
So say your head measurement is 22, divide 22 by 3.14 = 7.
Remember when calculating diameter, you must account for the stretch of your yarn too.
So once the ‘flat portion’ for the crown (or the first few rounds while you are still increasing) of your cap is 7” diameter, you can stop increases and start increasing just the length (without increasing stitches for the round)
Right then, back to the pattern sheet.
The pattern is well written and a lovely
one. As we’re using a thicker yarn, we
finish the whole hat in barely 22 rounds and half a day!
I have, however, decided on a few small changes.
1) I’ve
started with a magic circle and then worked the sc in that circle, rather than
the start suggested. I’ve then worked
the rest of the pattern the way written.
2) I
also decided to use the back loops for the whole pattern, as I love the effect
this gives, and thought that with my solid plainer yarn, this will give a nice
finish. So I used the half double
crochet in back loops only (hdc-blo)
3) Instead
of the pom-poms, I’ve decided to make a little rose. This is a really common pattern that I am
sure you know, but I’ll write it down here anyway.
Rose motif :
Foundation Single Crochet : fsc : To refresh your skill on the fsc, please view this video https://youtu.be/mcT85fwh4mA
Start : with a fsc
chain of 31 ch (or any number of uneven stitches for the length you want). Turn.
Row 1 : sc
in the 1st fsc ;
*ch 2, sk next fsc, sc in the next fsc* ;
rep *to*
till end. Turn
Row 2 : sl-st
in the 1st ch-2 sp ;
ch 2, 2 dc ; ch 2, sl-st all in the same 1st
ch-2 sp ;
*sl-st in
the next ch-2 sp ;
(ch 2, 2 dc ; ch 2, sl-st all in the same ch-2 sp)* ;
rep *to* till end.
Leave a long tail to sew the lower part into a
flower and cut off yarn.
Finishing : Roll
your little flower strip in such a way that
a) You
have the right side facing outside, so you will be holding the wrong side and
rolling it together with wrong side, touching wrong side of work
b) Start
rolling from the start end, so that you will be holding the long yarn for
sewing at the other end, and it’s easy to sew.
c) Run
a few rows of stitches through the bottom, neatly securing the folds / petals
of our flower
d) You
can either sew this on directly onto your project, OR you can make a small chain
length and attach a press button to the two ends of this chain strip. This way you can attach this anywhere.. on
this project or some other project as well.
Enjoyed this ?? I sure did.. come back right
here for more freebie patterns
If you're visiting me here for the first time, and have liked the experience, do add me to your mailing list (for your convenience) , and all my future free patterns will come straight to your mail box.
I’d appreciate if you could credit my blog (and link the original pattern link) when you make your own creation. Thanks.
Check out my awesome pins on Pinterest at https://in.pinterest.com/shyamanivas/
OR just my free patterns at https://in.pinterest.com/shyamanivas/free-patterns-made-by-me/
Join me on YouTube at http://youtube.com/shyamanivas
And on my Facebook page at https://www.facebook.com/Sweet-Nothings-Crochet/ for more patterns.
Do follow me on Twitter https://twitter.com/ShyamaNivas
Do follow me on Instagram https://www.instagram.com/sweetnothingscrochet/
Do also visit me at http://www.craftsy.com/user/2573073/pattern-store?_ct=cx-buvjdql&_ctp=my-pattern-store,manage
Have a great day and see you soon.
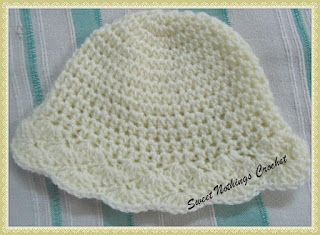
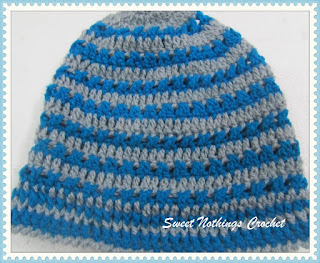
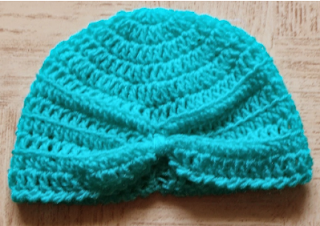
Here are some of my other headwear creations. Have fun with these patterns too
