SIS ‘N ME BEANIES
( #Blogaday 23/365 )
I have a really good friend who’s off to the UK
shortly and as she’s visiting her son and 3 grand daughters and one grandson, I
thought this would be the ideal gift for the young ladies of that family.
Thank you for joining me.
In case you have just joined me, know that you can access all of my earlier creations by checking under ‘categories’ on the right hand side of this blog under “Labels”. Then, for your convenience, follow me here or on Facebook, You Tube, Pinterest, Twitter or Instagram.
Check out all my social media handles at the bottom of this blog
Oh, and may I add that the fastest way to find any of my blogs is via Pinterest.
All my blogs can be printed. Find the printer friendly (green) link at the bottom of this blog. You can also hit Control P (or Command P for Mac) on your keyboard, and the blog will go directly to the connected printer.
Remember that you only print if absolutely essential. Save paper – Save Our Earth.
Do remember to add my blog URL when you make and show off your creation.
Just copy the link on the search bar above - that's the blog URL.
To purchase this or similar yarn online, click here to buy your yarns online via Amazon. While you will still pay the same, I may get paid by Amazon as well.
This is a free blog - so do pay it forward for me. Cheers.
Materials used : Today I’ve used our lovely Indian Oswal Cashmilon 4-ply yarn and
Indian ICE Batik acrylic 4-ply yarn with a 4 mm crochet hook
In general : Use any yarn with a suitable hook to make these projects.
International yarns : Among the international yarns I have used , I’d suggest Aunt Lydia Cotton 10, Aunt Lydia Bamboo-Viscose 10, DMC Petra, Sullivans knitting cotton (Australia), Milford Soft, Hilaza Rustica Eclat , Alize cotton yarn and Alize bamboo yarn.
Abbreviations used :
lp(s) : Loop(s) sc : Single crochet
dc : Double crochet sp : Space
sl-st : Slip stitch ch : Chain
st(s) : Stitch(es) hk : Hook
yo : Yarn Over
Stitches used :
Double Crochet : dc : yo, insert hk into st ; yo (3 lps on hk);
[yo, draw through 2 lps] twice. One dc made.
Chainless start for Double Crochet : I dislike the ch-2 / ch – 3 start, and this is what I do to start my row of dc.
Abbreviations used :
lp(s) : Loop(s) sc : Single crochet
dc : Double crochet sp : Space
sl-st : Slip stitch ch : Chain
st(s) : Stitch(es) hk : Hook
yo : Yarn Over
Instructions : (Using U.S terminology)
Please note that I start all my rows with a ch 1, turning chain for ease.
Please check the top of this blog for easy video tutorials on all stitches used in today's pattern.
Please read through all my notes before you pick up your hook, so you know just where we're heading in our pattern.
In my patterns I work with the principle of stitch count and body measurement. This means that you need to work the stitch count in pattern, till you get the measurement (length and/or width) that you need for your project.
In keeping with the new trending article in
headwear, I thought the young ladies should get the trendy pony tail or Messy
Bun cap. Come along and let’s see what
we have here.
1.
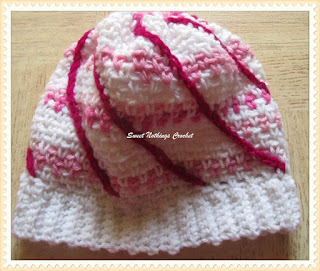
Shelled toddler Pony tail
cap for Sarah
This cap is also called the Messy Bun cap, but
with a little baby girl, I thought the words “Pony Tail Cap” worked better –
and if I am not mistaken, this was the earlier messy bun cap anyway.. this is
just the new trending thing, so one seems to have forgotten pony tails and the
caps to ease their sticking out at the top of the head ! J
I am going to make a few pieces of headwear, and
I thought I’d go through a range of freebie patterns, testing them for and with
Indian locally available yarns.
Do check her blog for an awesome range of other
free crochet stuff as well.
For this pattern, I’ve used a combination of
Oswal Cashmilon 4-ply acrylic in white, and Indian ICE Batik 4-ply acrylic yarn
in shaded pink with a 4 mm crochet hook.
I’ve used the pattern as written and achieved a
size of 5.5” length from crown to forehead and a circumference of 17” which is
perfect for the 3 yr old toddler I’m making this for.
2.
Shelled toddler Pony tail
cap for Sriya
This second cap is also a Pony Tail cap, and I’ve
taken an existing pattern from Bethany of Whistle & Ivy and have tweaked it
a bit to get this cap.
I’ve made this for a 9 yr old child, so as per
the chart above, I have worked it to the dimensions given there.
For this pattern too I’ve used the same
combination of yarns I used for the first project and a 4 mm crochet hook.
Small changes I made as the original pattern is
intended for an adult sized cap.
I started with 6 fsc and worked an sc-blo
(single crochet back loop only) in each fsc back and forth. I then worked sc-blo in each sc making this
little band till it was about 18”, which is the circumference I needed for my 9
yr old child cap. I then joined the two
sides of this band, and started working the linen stitch for the body of the
cap.
For my child cap length, I need about 6”, so
including the width of the band, I worked the body pattern till I had about 5”
as I am making a pony tail cap, and that means at least 1-1.5” off the top of
the head should work.
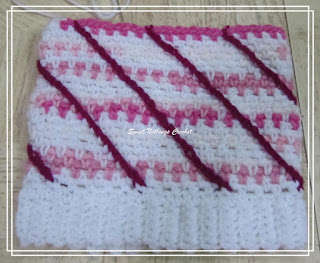
I finally followed the instructions for the
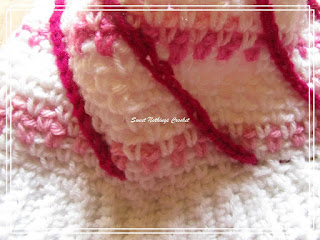
sl-st pattern all the way diagonally across the cap. To get the diagonal accent, I have used the
brighter pink (also Indian Oswal Cashmilon with the 4 mm crochet hook)
Finishing ideas
For this beanie especially, we need to bring the cylinder
like top to a close. Now if we’re making
a regular cap, you just pass a needle through that top bit and cinch it
close. In this case, what I’ve decided
to do is get a small elastic band, and attach that to the top of the crown
opening, to get it cinched close, but still leave a small gap where the pony
tail or bun can peep out of. I think
this is also a great idea for all other caps that do not have this finish – i.e
for Caps 1 above and the Shelled cap below, which have been started from the
crown. I feel that using the elastic
around the top will give it a close finish and will still allow a good stretch
around the pony tail. Try it out and let
me know how that works for you.
Have fun creating something beautiful and hope
the recipient loves it too.
Enjoyed this ?? I sure did.. come
back right here for more freebie patterns
If you're visiting me here for the first time, and have liked the experience, do add me to your mailing list (for your convenience) , and all my future free patterns will come straight to your mail box.
I’d appreciate if you could credit my blog (and link the original pattern link) when you make your own creation. Thanks.
Have a great day and see you soon.
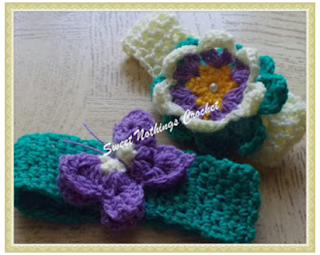
Here are some of my other headwear creations. Have fun with these patterns too


No comments:
Post a Comment
Thanks for taking the time to stop by. Do tell me what you think. Cheers