Welcome to Sweet Nothings Crochet for loads of free crochet patterns, video tutorials & awesome creations. If you want to learn, or just want to see some great free patterns, you're in the right place. All my blogs have video tutorials with loads of ideas thrown in for good measure. Thanks for dropping by and I hope you'll stay a while.
Tuesday, 10 January 2017
CHRISTMAS ANGEL - 2
CHRISTMAS ANGEL - 2
( #Blogaday 10/365 )
Welcome back to my second blog on the beautiful
Christmas Angel. Yes, this is a bit late for Christmas of 2016, but there's always next year 😊
If you are a regular visitor, you’ll know that
my appeal to share my blog post when you make your project.
If you are visiting me for the first time,
welcome and let’s hope you hang around for a while .. and do check out my
earlier blogs on my appeal. Thanks.
Thank you for joining me.
In case you have just joined me, know that you can access all of my earlier creations by checking under ‘categories’ on the right hand side of this blog under “Labels”. Then, for your convenience, follow me here or on Facebook, You Tube, Pinterest, Twitter or Instagram.
Check out all my social media handles at the bottom of this blog
Oh, and may I add that the fastest way to find any of my blogs is via Pinterest.
All my blogs can be printed. Find the printer friendly (green) link at the bottom of this blog. You can also hit Control P (or Command P for Mac) on your keyboard, and the blog will go directly to the connected printer.
Remember that you only print if absolutely essential. Save paper – Save Our Earth.
Do remember to add my blog URL when you make and show off your creation.
Just copy the link on the search bar above - that's the blog URL.
To purchase this or similar yarn online, click here to buy your yarns online via Amazon. While you will still pay the same, I may get paid by Amazon as well.
This is a free blog - so do pay it forward for me. Cheers.
Inspired by a photo below with its attached graph /
chart, here are original my pattern notes.
Materials used : Today I have
used ~ about a little bit of our lovely Indian Red rose metallic cotton yarn
and a little of the wonderful Hilaza Rustica metallic cotton yarn with a 1.3 mm crochet hook ; fabric glue to seal ends and Mod Podge for stiffening & protecting your project.
This yarn is not specific for this project.
You can use any yarn with a suitable hook to make this project to any size.
Please note that I start all my rows with a ch 1, turning chain for ease.
Please check the top of this blog for easy video tutorials on all stitches used in today's pattern. For your convenience there video tutorials through the blog too
Please read through all my notes before you pick up your hook, so you know just where we're heading in our pattern.
In my patterns I work with the principle of stitch count and body measurement.
This means that you need to work the stitch count in pattern, till you get the measurement (length and/or width) that you need for your project.
In my earlier (first) angel, I’ve made it
totally in a metallic cotton yarn, but for this one, I thought I’d make it in
white, and work the sides in gold
Just for convenience, I’m going to write MC (or
Main Colour) for the white yarn and CC (or Contrast Colour) for the gold
yarn.
That said, you could make this all
in one colour as well. Create and enjoy.
How to change colors seamlessly : Here’s an easy video tutorial to show you how to change from the Main color to the Contrast or second color of yarn seamlessly. View it at https://youtu.be/fRzSBja9jno
In the following round, we’ll create the halo
around the angel’s head using CC.
So attach your CC yarn and fasten off MC.
Single Crochet : Sc : yo, insert hk into st ; yo (2 lps on hk); yo, draw through both lps. One sc made. Check out the video at https://youtu.be/ghACqBpA-3k
First stitch for Single Crochet : This is how I like to start my row of sc. Check out the video at https://youtu.be/6pVYRfsf4_M
Round 3 : (with CC) :
sc in the 1st dc and in
each dc all around.
Join with a sl-st to
the 1st dc.
In this round, we will work only on the tiara
bit of the halo
Half Double Crochet : Hdc : yo, insert hk into st ; yo (3 lps on hk) ;
Chainless start for Half Double Crochet : I dislike the ch-2 start, and this is what I do to start my row of hdc. Check out the video at https://youtu.be/lWXpl1KdbZ8
Triple Crochet : trc : wrap yarn twice around hook, insert hk into st ; yo (4 lps on hk); [yo, draw through 2 lps] three times. One trc made.
We will continue to use the CC colour for the
collar and then switch to MC.
We will now work side to side on the body of the
little angel.
Just for convenience,
let’s start renumbering our rows.
So you are now at the chin, and you will start
working on the next st
Row 1 : (with CC) :
sc in the next sc ;
ch 5, sk next 2 sc, sc in the next sc ;
sl-st in the last 8
sc. Turn.
Fasten off CC.
Re-attach MC at the 2 sc
before the ch-5 sp on the ‘chin’ or head part of our angel.
With the first few rows, we need to attach the
top part of the wings to the head, so we will be working a few sl-sts with each
growing row.
Row 2 : (with MC) :
11 dc in the ch-5 sp ;
sk next 2 sc, sl-st in the next sc of the head row. Turn.
Row 3 : (with MC) :
ch 1, sk 2 sc of the head row and sl-st in the next st ; Turn.
2 dc in the 1st dc ;
(ch 1, dc in the next dc) ;
rep (to) 8 times ;
ch 1, 2 dc in the last dc ;
ch 1, sk next 2 sc of the head row and sl-st in the next sc. Turn.
Once again, we will join the wings to the head –
so yet again we will sl sts and join to the sc of the head row
Row 4 : (with MC) :
ch 1, sk sc of the head row and sl-st in the next st ; Turn.
sk the ch-sp and sc ; dc in the 1st 2
dc ;
(2 dc in the next ch-1 sp ; dc in the next dc) ;
rep (to) 8 times ;
2 dc in the last ch-1 sp ; dc
in the last 2 dc ;
ch 1, sk next sc of the head row and sl-st in the
next sc. Turn.
Fasten off MC.
Re-attach CC in the next sc of the head row (i.e towards the head
tiara).
For the last time, we are going
to attach the wings to the head.
Row 5 : (with CC) :
ch 1, and sk sc and ch-sp ;
sc in the 1st dc and in each dc till end
;
sk sc and ch-sp, sl st in the next sc of the head. Turn.
Fasten off CC.
Re-attach MC in the 1st sc.
Row 6 : (with MC) :
dc in the 1st sc ;
(ch 2, sk next sc, dc in the next sc) ;
rep (to) till end. Turn.
Row 7 : (with MC) :
2 dc in the 1st dc ;
(ch 2, 2 dc in the next dc) ;
rep (to) till end. Turn.
Fasten off MC.
Re-attach CC in the 1st dc.
Row 8 : (with CC) :
sc in the 1st dc ;
(2 sc in the next ch-2 sp ; sc in the next dc) ;
rep (to) till end. Turn.
Fasten off CC.
Re-attach MC in the 1st sc.
In the following row, we will work first one
wing, then the other, and finally come back to the centre to work the ‘dress’
for our angel.
Row 9 : (with MC) :
dc in the 1st 2 sc ;
(ch 2, sk next 2 sc, dc in the next 2 sc) ;
rep (to) 5 times. Turn.
This our first wing sectioned off.
Row 10 : (with MC) :
dc in the 1st 2 dc ;
(ch 3, dc in the next 2 dc) ;
rep (to) 5 times. Turn.
Row 11 : Rep Row 10.
Row 12 : (with MC) :
dc in the 1st 2 dc ;
(ch 4, dc in the next 2 dc) ;
rep (to) 5 times. Turn.
Row 13 : Rep Row 10.
Fasten off MC and weave in ends.
Re-attach yarn at the far end of the wing for
the 2nd wing.
Rep Rows 10 – 13 for
the 2nd wing.
You now have both your wings complete and a
section in the centre that will make up the centre of the dress for your angel.
Re-attach your MC yarn on the dc at one end.
We will now work only on this centre part
of the angel’s dress.
Rep Rows 10 – 12 on
the centre part of the angel’s dress as well.
Please note that Row
13Ahere applies only for this
centre part of the angel’s dress.
Row 13A : (with MC) :
dc in the 1st 2 dc ;
(ch 2, sc in the next ch-4 sp ;
ch 2, dc in the
next 2 dc) ;
rep (to) 3 times. Turn.
In the following rows, we’re going to work a dc
2-tog over 2 ch-sps. Usually we
work a dc 2-tog over 2 sts, so it’s the same thing, just work it over the
ch-sps, ignoring or skipping the st in between.
Row 14 : (with MC) :
dc in the 1st 2 dc ;
(ch 2, skipping sc, dc 2-tog over the next 2 ch-2
sps ;
ch 2, dc in the next 2 dc) ;
rep (to) 3 times. Turn.
Row 15 : (with MC) :
dc in the 1st 2 dc ;
(ch 2, skipping dc 2-tog, dc 2-tog over the next
2 ch-2 sps ;
ch 2, dc in the next 2 dc) ;
rep (to) 3 times. Turn.
Row 16 : (with MC) :
dc in the 1st 2 dc ;
(ch 3, skipping dc 2-tog, dc 2-tog over the next
2 ch-2 sps ;
ch 3, dc in the next 2 dc) ;
rep (to) 3 times. Turn.
Row 17 : (with MC) :
dc in the 1st 2 dc ;
(ch 4, skipping dc 2-tog, dc 2-tog over the next
2 ch-3 sps ;
ch 4, dc in the next 2 dc) ;
rep (to) 3 times. Turn.
Row 18 : (with MC) :
dc in the 1st 2 dc ;
(ch 4, skipping dc 2-tog, dc 2-tog over the next
2 ch-4 sps ;
ch 4, dc in the next 2 dc) ;
rep (to) 3 times. Turn.
Row 19 : (with MC) :
dc in the 1st 2 dc ;
(ch 5, skipping dc 2-tog, dc 2-tog over the next
2 ch-4 sps ;
ch 5, dc in the next 2 dc) ;
rep (to) 3 times. Turn.
Row 20 : (with MC) :
dc in the 1st 2 dc ;
*ch 5, (dc ; ch 3, dc all on the next dc 2-tog)
;
ch 5, dc in the next 2 dc) ;
rep *to* 3 times. Turn.
Row 21 : (with MC) :
dc in the 1st 2 dc ;
(ch 4, 5 dc in the next ch-3 sp ;
ch 4, dc in
the next 2 dc) ;
rep (to) 3 times. Turn.
Row 22 : (with CC) :
dc in the 1st 2 dc ;
(ch 3, 2 dc in the each of the next 2 dc ;
3 dc
in the next dc ; 2 dc in each of the next 2 dc ;
ch 3, dc in the next 2 dc) ;
rep (to) 3 times. Turn.
Row 23 : (with CC) :
dc in the 1st 2 dc ;
*ch 3, dc in the next dc ;
[ch 2, sk next dc, dc
in the next dc] ;
rep [to] once ;
(ch 2, dc in the next dc) ;
rep (to) once ;
rep [to] 2 times ;
ch 3, dc in the next 2 dc* ;
rep *to* 3 times. Turn.
Row 24 : (with CC) :
dc in the 1st 2 dc ;
*2 dc in the next dc ;
[ch 2, 2 dc in the next
dc] ;
rep [to] 5 times ;
dc in the next 2 dc* ;
rep *to* 3 times. Turn.
In our last row, we’re going to work another
unusual dc 2-tog.
In this dc 2-tog
we will once again work over 2 dc, but we will skip 4 dc in between.
So what does this mean?
Let’s count out our stitches.. dc #1 , dc #2
… all the way to dc #6.
So our dc 2-tog
will be over dc #1 and dc #6, skipping four sts from dc #2 – dc #5. Got it?
Row 25 : (with CC) :
sk 2 dc in between , dc 2-tog over the 1st and 4th dc ;
*[ch 2, dc in the next 2 dc] ;
rep [to] 4 times ;
ch 2, sk 4 dc in between, dc
2-tog over 2 dc* ;
rep *to* 3 times ;
till the last dc 2-tog ;
skipping 2 dc in between, dc 2-tog over the 4th last and the last dc. Turn. (Check Note)
Note :Here’s
where you will take a decision.
You can
decide to finish off now after Row 24 OR you can decide to work a round of sc
in CC all around.
If you decide to finish off after Row 24, fasten
off and weave in ends.
If you decide to work a round of CC all around,
then you will work one sc in each dc ; 2 sc in each ch-2 sp for Row 24. When you reach the corners, you will work 2
sc in each corner (for turning ease).
You will work 2 sc in each vertical bar of the dc and 1 sc in
each vertical stitch of sc all the way up to the wings. When you reach the point where your wing
touches the neck/body, fasten off and weave in ends. You will then re-attach your yarn at the
other end of the neck/body/wing point and work all the way up and across your
wing and all the way down to the skirt of your little angel. Fasten off and glue in all ends.
Finishing :
I would suggest that you block your angel,
especially if you’ve used a cotton yarn.
First lightly iron it (using a light muslin cloth as a cover between the
iron and your work – i.e do not iron directly on the work). This stretches and flattens down your work.
Use a white glue (Mod Podge or Indian Fevicol)
as a stiffener. I use 1 part glue to 2
parts water and make a light paste, and then I lightly apply this over the back
of my work using a paint brush. Allow to
flat dry before gifting or using it as your decoration.
Have a fun creative time.
Enjoyed this ?? I sure did.. come back right
here for more freebie patterns
If you're visiting me here for the first time, and have liked the experience, do add me to your mailing list (for your convenience) , and all my future free patterns will come straight to your mail box.
I’d appreciate if you could credit my blog (and link the original pattern link) when you make your own creation. Thanks.
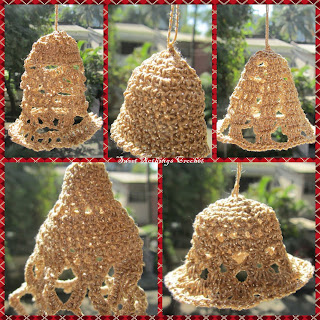
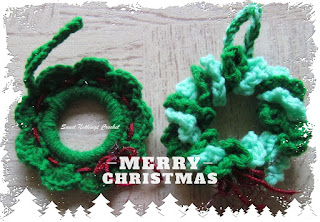
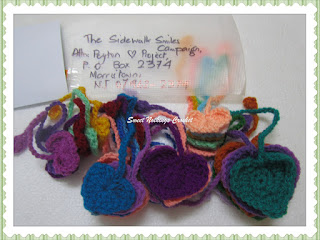
I have a few miscellaneous crochet articles already
made, andjust
in case you want a dekho at those patterns … here you go. Click on the photo or the link below to get to the pattern blog.


No comments:
Post a Comment
Thanks for taking the time to stop by. Do tell me what you think. Cheers