Saturday 14 January 2017

MY TOPSY-TURVY CINDERELLA DOLL

crochet toy, amigurumi
MY TOPSY-TURVY CINDERELLA DOLL
( #Blogaday 14/365 )

Sometime last month, I made my first topsy turvy doll, which started off like a cupcake that transformed into a doll. 
I then thought (oh, didn’t I think I am oh, so smart.. LOL!  ;) ) that I’d come up with this huge range of similar stuff.. starting with Cinderella in her cinders dress which when flipped over would be Cinderella in her ball gown. 

So still in my blissful ignorance, and trying to create a Cinderella doll myself, I found a freebie pattern for a basic pattern, and worked off that to create *my genius idea* ;)  .. and halfway through my creation, lo behold, I find that there *are* patterns readily available…. And that too for exactly what I was making!!
 
So anyway, I made my creation with my own twists and tweaks, and now give you lots of ideas.. so let’s go ahead and create and spread smiles.

Thank you for joining me.

In case you have just joined me, know that you can access all of my earlier creations by checking under ‘categories’ on the right hand side of this blog under “Labels”.  Then, for your convenience, follow me here or on Facebook, You Tube, Pinterest, Twitter or Instagram.

Check out all my social media handles at the bottom of this blog

Oh, and may I add that the fastest way to find any of my blogs is via Pinterest.


All my blogs can be printed.  Find the printer friendly (green) link on the right side of this blog.  You can also hit Control P (or Command P for Mac) on your keyboard, and the blog will go directly to the connected printer.

Remember that you only print if absolutely essential.  Save paper – Save Our Earth. 


Do remember to add my blog URL when you make and show off your creation. 

Just copy the link on the search bar above - that's the blog URL.


To purchase this or similar yarn online, click the highlighted links below to buy your yarns online via Amazon.  While you will still pay the same, I may get paid by Amazon as well. 

This is a free blog - so do pay it forward for me.  Cheers.


Materials used : Today I’ve used some of our lovely Indian Oswal 4-ply yarn with a 3 mm crochet hook ; a little embroidery thread ; embroidery needle fabric glue to seal ends ; crochet stitch markers ; poly-fill stuffing ; stocking net ; safety eyes ; beads n   more ; satin ribbon

For Indians You could use Anchor , Red rose , 4-ply knitting cotton , or unbranded knitting cotton or White Rose or bamboo knitting cotton , Milk cotton ; Silk yarns as well as Vardhaman acrylic yarns ; Baby soft acrylic yarn , Ganga Spectrum as well

General yarn info : The yarn used today is not specific to this pattern.
You can use any yarn with a suitable hook to make this project to any size.
     
International yarns :  Among the international yarns I have used in this thickness, I’d suggest Aunt Lydia Cotton 10, Aunt Lydia Bamboo-Viscose 10, DMC Petra, Sullivans knitting cotton (Australia), Milford Soft, Hilaza Rustica Eclat , Alize cotton yarn and Alize bamboo yarn , Lily Sugar n' Cream cotton yarn, Caron Simply Soft , Bernat Softee chunky.

Size : 7” tall ; 5” around the base

Skill Level : Intermediate to advanced


Abbreviations used :
ch : chain              ch-sp : chain space
sp : space             rep : Repeat
fsc : Foundation single crochet          
dc : Double crochet


Stitches used :
Starting slip knot :  https://youtu.be/lJcqsVcs8cw 

Starting slip knot 1 or the Sloppy Slip knot :  https://youtu.be/YfC7KmGpifs

Magic circle :  https://youtu.be/ISC39yOqWro 

Single Crochet : Sc : yo, insert hk into st ; yo (2 lps on hk); yo, draw through both lps.  One sc made.  Check out the video at https://youtu.be/ghACqBpA-3k

First stitch for Single Crochet : This is how I like to start my row of sc. Check out the video at https://youtu.be/6pVYRfsf4_M 


Whipstitch to join :  https://youtu.be/wZ-9LNzftMA

Invisible join :  https://youtu.be/a6XZQ6VzJFM

Single crochet to join :  https://youtu.be/6FXoW_47_dI

Instructions using U.S terminology
Please note that I start all my rows with a ch 1, turning chain for ease.
Please check the top of this blog for easy video tutorials on all stitches used in today's pattern.  For your convenience there video tutorials through the blog too
Please read through all my notes before you pick up your hook, so you know just where we're heading in our pattern.
In my patterns I work with the principle of stitch count and body measurement.  
This means that you need to work the stitch count in pattern, till you get the measurement (length and/or width) that you need for your project.  

While the pattern itself is from another link, there are a lot of interesting links on the top of my blog for a “how to”.. so do take a look at that before you head off to get your free pattern.  In this cute little Cinderella pattern, you will need to work in back loops and also use beads, and I’ve given links on “how to” above.

I used this full pattern for a Magical Cinderella at http://www.ravelry.com/patterns/library/magic-cinderella  


and here are allllllll my photos to get you excited and cracking  

crochet toy, doll
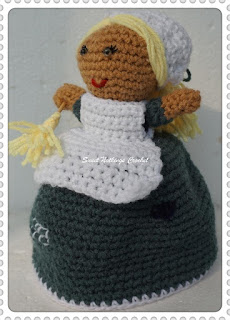
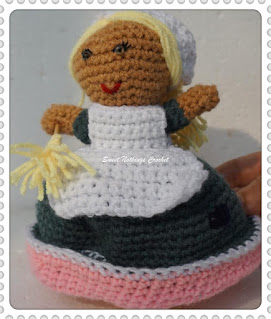
So here is Cinderella working hard in the house..

crochet toy, doll
A duster in her hand. ...

crochet toy, doll
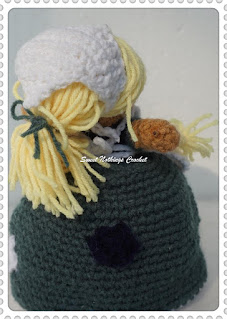
and a scarf on her head

crochet toy, doll
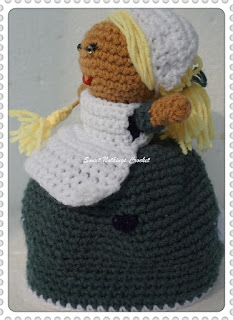
Slaving away to keep the house clean..

crochet toy, doll
torn clothes.. patched for wear

crochet toy, doll

crochet toy, doll

crochet toy, doll

crochet toy, doll
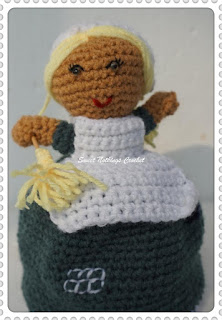
but still a smile on her face...

crochet toy, doll
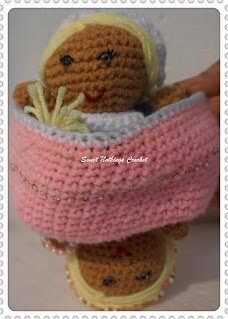
and then Shazaam !! 

crochet toy, doll
The Fairy God mother waves her wand..

crochet toy, doll
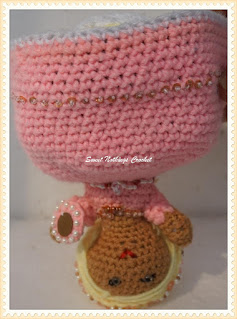
....and watch the transformation...

crochet toy, doll

crochet toy, doll

crochet toy, doll

crochet toy, doll

crochet toy, doll
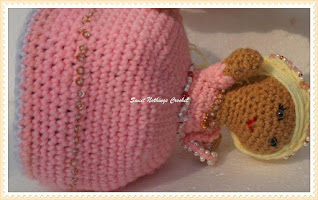
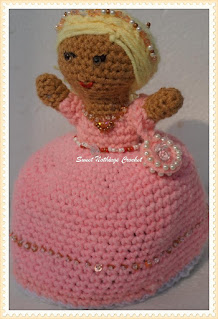
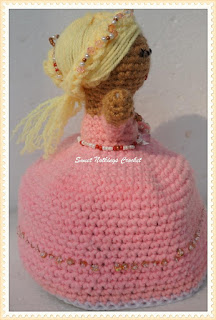
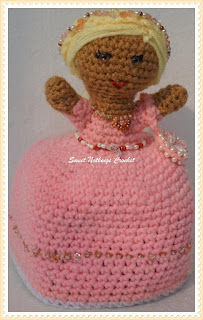
as Cinderella gets ready for The Ball!

crochet toy, doll

crochet toy, doll

crochet toy, doll

crochet toy, doll

crochet toy, doll

crochet toy, doll

crochet toy, doll

crochet toy, doll

I found several basic doll ideas and I loved this one from Lisa Auch at http://www.crochet-patterns-free.com/2014/08/free-crochet-amigurumi-doll-pattern.html, which I have not used this time, but am surely going to use it shortly.

Finally there are a set of topsy turvy dolls, which are stunningly fantastic, but these is not a free pattern.  Buy it at http://www.ravelry.com/patterns/library/cupcake-topsy-turvy-doll


My small tweaks : If you are making this for a really small child, please be very careful using these tweaks as they may hurt the child.

1.       Cleaning brush : I added a cleaning brush onto the Cinders side of the Cinderella doll.  I took a regular toothpick and passed it through her soft hand (Ouch ?!) and at the other (pointed) end, I added a few bits of yarn which I tied tightly around the centre of the toothpick to mimic a cleaning brush.  I have ensured that I cut the tip of the toothpick off, but this is still a little dangerous, so be warned.
2.     Tiny handbag :  The fancy handbag obviously goes onto the arm of the “Ready-To-Go-To-The-Ball” Cinderella.   I started with a magic circle and worked 10 sc into that circle.  Join with a sl-st to the 1st st.  For the handle, I worked about 15 ch from where I’d joined to the 1st st, and then re-join again at that same st.  for a neat edge, I cut my yarn with a tail of about 8” , and wove the tail in and out of the back loop of the sc around magic circle.  This gives a beaded edge on one side (front) and a neat finish on the other side too.  I then added beads (with a sewing needle) all around the tiny little handbag and strung it onto Cinderella’s arm.  Now she’s all ready to go to the ball.
3.     The designer has used larger beads and added them to the yarn before use.  I did not have beads large enough for my yarn in the color I wanted, so I have ‘cheated’ and added them in after completing the dress with a sewing needle.
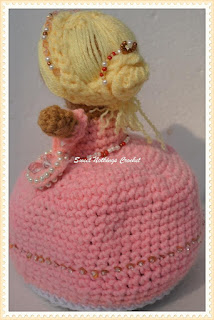
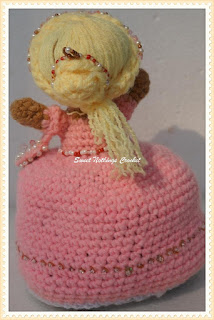
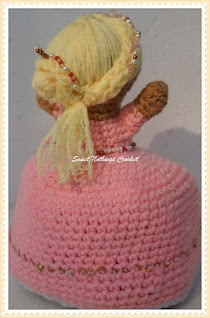
4.     For a final tweak and cute look, I have teased the yarn for the hair, unravelling the 4-ply and giving it a lovely curly frizzy look
5.     If using safety eyes for your little doll, ensure you glue then in well .  If not , please check the links given above for “how to make a French knot” and use that to embroider in your eyes.

So go ahead, go crazy and create.
One little princess is going to be mighty pleased!

Enjoyed this ?? I sure did.. come back right here for more patterns. 

If you're visiting me here for the first time, and have liked the experience, do add me to your mailing list (for your convenience) , and all my future free patterns will come straight to your mail box.  

I’d appreciate if you could credit my blog (and link the original pattern link) when you make your own creation.  Thanks.

Check out my awesome pins on Pinterest at https://in.pinterest.com/shyamanivas/


Join me on YouTube at http://youtube.com/shyamanivas

And on my Facebook page at https://www.facebook.com/Sweet-Nothings-Crochet/ for more patterns.

Do follow me on Twitter https://twitter.com/ShyamaNivas


Find me on Ravelry at ravelry.com/projects/shyamanivas/

Have a great day and see you soon. 

You may want to take a look at some more beautiful and unusual amigurumi / toy projects.


... and some more home use miscellaneous projects and free patterns ...


and some home use / miscellaneous free patterns ...