SOME MORE FUN CURLY WURLIES SCRUNCHIES FOR HAIR
( #Blogaday 20/365 )
This is my second blog on fun scrunchies for
young girls. After I posted my first
blog, I was inundated by “more patterns please” requests, and as I have a
family expected shortly, and little girls visiting in that group, I thought
this was the ideal time to get 2 birds with one stone – Get the request done
and get my gifts ready too.
Thank you for joining me.
In case you have just joined me, know that you can access all of my earlier creations by checking under ‘categories’ on the right hand side of this blog under “Labels”. Then, for your convenience, follow me here or on Facebook, You Tube, Pinterest, Twitter or Instagram.
Check out all my social media handles at the bottom of this blog
Oh, and may I add that the fastest way to find any of my blogs is via Pinterest.
All my blogs can be printed. Find the printer friendly (green) link at the bottom of this blog. You can also hit Control P (or Command P for Mac) on your keyboard, and the blog will go directly to the connected printer.
Remember that you only print if absolutely essential. Save paper – Save Our Earth.
Do remember to add my blog URL when you make and show off your creation.
Just copy the link on the search bar above - that's the blog URL.
To purchase this or similar yarn online, click here to buy your yarns online via Amazon. While you will still pay the same, I may get paid by Amazon as well.
This is a free blog - so do pay it forward for me. Cheers.
Note : Mod Podge will not work on / stiffen acrylic
International yarns : Among the international yarns I have used , I’d suggest Aunt Lydia Cotton 10, Aunt Lydia Bamboo-Viscose 10, DMC Petra, Sullivans knitting cotton (Australia), Milford Soft, Hilaza Rustica Eclat , Alize cotton yarn and Alize bamboo yarn , Lily Sugar n' cream , ICE Batik yarn, Caron Simply Soft
In general : Use any yarn with a suitable hook to make these projects.
Skill level : Easy to intermediate. Basic sewing skills needed.
Stitches used :
Double Crochet : dc : yo, insert hk into st ; yo (3 lps on hk);
[yo, draw through 2 lps] twice. One dc made.
Chainless start for Double Crochet : I dislike the ch-2 / ch – 3 start, and this is what I do to start my row of dc.
Abbreviations used : (Using U.S terminology)
lp(s) : Loop(s) sc : Single crochet
dc : Double crochet ch : Chain
sp : Space sl-st : Slip stitch
st(s) : Stitch(es) hk : Hook
yo : Yarn Over
dc 2-tog : Double crochet 2-together
Instructions : (Using U.S terminology)
Please note that I start all my rows with a ch 1, turning chain for ease.
Please check the top of this blog for easy video tutorials on all stitches used in today's pattern. For your convenience there video tutorials through the blog too
Please read through all my notes before you pick up your hook, so you know just where we're heading in our pattern.
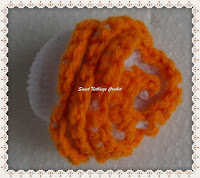
Curly wurly 1
There are no written instructions, so my notes here are for what I have done.
Materials used :
Oswal Cashmilon 4-ply yarn, with a 4 mm crochet hook ; one rubber band.
Skill level :
Easy
Decide on the colour and then attach that yarn to
the rubber band with a slip knot.
Tie a
secure knot and we’re ready to start.
Start Round 1 : sc in the rubber band ;
(ch 2, sc in the same
rubber band) ;
rep (to) all around till you have covered the rubber band
completely.
Join with a sl-st to the 1st
sc.
Note :
When the rubber band is worn, it will stretch,
and you need to not only account for that stretch, but also account for the
fact that if you use too few stitches, you will see the rubber band. That said, also remember that you stitch
tension should not be too tight, as you will hamper the stretch of the rubber
band.. so work loose.
Round 2 :
sl-st into the 1st ch-2 sp ; sc in
the same ch-2 sp ;
(ch 3, sc in the next ch-2 sp) ;
rep (to) all around
and join with a sl-st to the 1st sc.
Round 3 :
sl-st into the 1st ch-3 sp ;
(ch 2,
5 dc) all in the same ch-3 sp ;
*sc in the next ch-3 sp ; ch 2, rep (to) all in
the next ch-2 sp* ;
rep *to* all around and join with a sl-st to the 1st
st.
Fasten off and weave in ends.
Tweak :
With this same pattern, here’s an idea to give
you a fuller scrunchie.
If you so
decide, Rounds 1 and 2 are the same.
There’s a change just in the last round, which I’m going to call Round
3A.
So in the original one, you’re
working the sc in the next ch-3 sp, but in the instructions below,
you’ll work it in the same ch-3 sp.
This means that you will have many more stitches per ch-3 sp, and that
will automatically add to the fullness.
Round 3 A :
sl-st into the 1st ch-3 sp ;
(ch 2,
5 dc ; sc) all in the same ch-3 sp ;
*sc in the next ch-3 sp ; ch 2, rep (to)
all in the next ch-2 sp* ;
rep *to* all around and join with a sl-st to the 1st
st.
Fasten off and weave in ends.
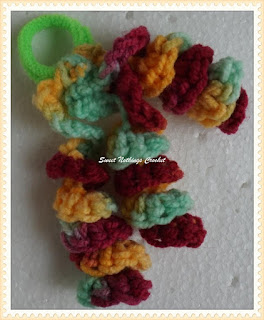
Curly wurly 2
Materials used :
Vardhaman Millenium variegated yarn, with a 4 mm crochet hook ; one rubber
band.
Skill level :
Easy
This is the cutest fastest pattern EVER. The trick to get this nice, full and fluffy
is to have as many sc as you possibly can on that 1st round
that wraps the rubber band up.
Curly wurly 3
Materials used :
Oswal Cashmilon 3-ply (lace weight) yarn, with a 3 mm crochet hook ; one rubber
band.
Skill level :
Easy
The designer has chosen a thinner hook, but
I’m working with a 3 mm crochet hook and it worked.
Curly wurly 4
Just look at this lovely rose.. how
can you resist this?
When I gave it to my niece, my cousin
commented that it looked like it was a real variegated rose on the hair and how
smart was this! I totally agree and kudos to the lovely designer for this super
free pattern.
Materials used :
Oswal Cashmilon 4-ply yarn, with a 3.5 mm crochet hook ; one rubber band.
Skill level :
Easy
For my first rose pattern, I used the white yarn
with the orange accent and have followed the pattern written by designer.
For the second rose, I used the white yarn with
the red accent and have made a small change for each petal – I’m not sure if
the photos show the difference, but I thought there was a difference.
So I followed the design for Rows 1 and 2, and
here are my small tweaks for Row 3.
Row 3 : (Petal Row)
: sl-st into the 1st ch-2 sp ,
[ch 2, 4 dc ; ch 2, sc] all in the same
ch-2 sp ;
*sl-st into the next ch-2 sp ; rep [to] once in the same ch-2
sp* ;
rep *to* all the way to the last ch-2 sp.
Turn.
Attach contrast colour ; fasten off Main colour.
Row 4 : (Using Contrast
colour) : sc in the 1st sc ;
*[sc in the next 4 dc, sc in the next 2
sc]* ;
rep*to* all the way to the end, ending with just 1 sc with the contrast
at the end, and then working one sl-st onto your rubber band to fasten the
contrast yarn.
Fasten off and neatly tie
up ends.
The main difference between this pattern and the
one earlier, is that each petal seems a little better defined, and so I thought
that it curled better into a rose. That
said, just a small tweak gives you a slightly different looking rose, so go
ahead and create.
Curly wurly 5
Materials used :
Vardhaman Millenium acrylic yarn, with a 4 mm crochet hook ; one rubber band.
Skill level :
Easy
Enjoyed this ?? I sure did.. come
back right here for more freebie patterns
If you're visiting me here for the first time, and have liked the experience, do add me to your mailing list (for your convenience) , and all my future free patterns will come straight to your mail box.
I’d appreciate if you could credit my blog (and link the original pattern link) when you make your own creation. Thanks.
Have a great day and see you soon.
Here are some of my other headwear projects …


No comments:
Post a Comment
Thanks for taking the time to stop by. Do tell me what you think. Cheers