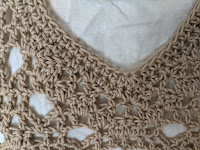
Row 4 : dc in the 1st dc ;
*[ch 1, dc in the next ch-3 sp ; ch 1, dc in the next dc] ;
dc 2-tog in the next ch-1 sp ; dc in the next dc ;
{ch 1, dc in the next dc} ;
(ch 2, sc in the next dc ;
ch 2, dc in the next dc ;
ch 2, sc in the next ch-3 sp ;
ch 2, dc in the next dc)* ;
rep *to* till the end. Turn.
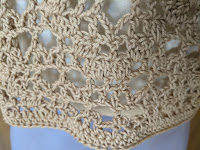
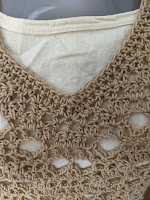
And this is our pattern. Two "V"-patterns followed by 2 ch-1 rectangle blocks and then a dc-2 tog and one more ch-1 block (which makes a set of 4 ch-1 blocks)
With each row we are moving the dc 2-tog one stitch to the right so that we get a neat diagonal of "V's" and a raised feature which is the dc 2-tog.
Neat pattern, eh?
Follow the chart above for more clarification.
Notes : The beauty of this pattern is that you can do so much with it.
I have given you the basic pattern but if you follow that through you will get diagonals that go from right to left all the way to the top.
So if you want to get the "V"-chevron effect, you need to find the centre of your first row, and then reverse the pattern for the left half of your project.
You will then get the dc 2-togs in the centre that will divide your work into the two diagonals, giving you the chevron effect. Follow the chart above for more clarification.
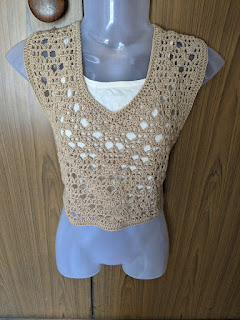
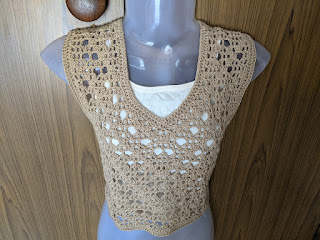
Idea A : For the neckline shaping : What I have done is decide how far or deep I want my neckline and then stopped at the centre point and decreased for the neckline.
How to decrease ? I have worked a dc 2-tog over 2 sets of sts skipping the ch-1 sp in between. This means that I am decreasing 2 sts per row for neckline. Continue decreasing similarly till you get the shoulder width needed and then stop decreases.
To stop decrease you just work dc on top of the last dc 2-tog st and you have a straight end to your neckline.
Remember to make a note of whatever you are doing to the first side of your neckline for easy repeat and mirroring on the other side
Idea B : NO neckline or armhole shaping : So continue without any shaping all the way to the shoulders. When you finish two rectangles (one each for back and front), join shoulders, leaving a neck opening and join sides, leaving an armhole opening, and you're top is done!
For the armhole shaping : I skipped sts (10 sts for my size, which includes dc and ch-sp) for the first row - the first row being the depth of the armhole (which is round armhole divided by 2 - so 15"/2 = 7.5" from top or shoulder in my case)
I then worked dc 2-tog over the next 2 sts skipping the ch in between, just like we have done for the neckline. I repeated the dc 2-tog decrease once more and I had the shape I needed for my armhole. I then continued working without decrease till I reached the shoulders.
Remember that sometimes your armhole shaping and neckline shaping may be at almost the same point, so you will decrease at both ends for a row or 2
For the back : I decided to work a plain pattern with just dc and ch-1 sps. I worked the same number of sts as I had for the front but worked dc in the 1st st ; ch 1, sk next st , dc in the next st and worked this simple pattern all the way to the end.
I mirrored the armhole shaping for front and back - so even back decreases were dc 2-tog skipping ch-sp in between.
For sleeves : I mulled over making sleeves but decided against it. Had I made sleeves I'd have chosen to work the same simple lacy pattern of the back.
For this I'd first join the sides and shoulders and then work a round of sc all around before starting the simple pattern.
Again ensure that you keep a note of the sts you work around the first armhole for convenience of mirroring the second armhole.
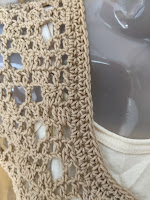
Finishing : I have worked hdc all around the armhole, base of top as well as neckline.
For the neckline, remember to work hdc 3-tog over the centre front 3 sts for a neat "V" finish (i.e. if you choose to work hdc. If you work sc, then of course you you need to work sc 3-tog over the centre 3 sts)

