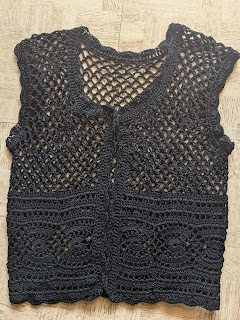
Round 3 for joining : dc in the 1st dc ;
*(2 dc in the next ch-1 sp ; dc in the next dc) ;
rep (to) 3 times ;
2 dc in the next ch-1 sp ;
[ch 2, join with sc in the next ch-5 sp of adjoining motif ;
ch 2, join with sc in the next ch-5 sp of motif you are working on] ;
rep [to] once* ;
ch 5, dc in the next dc ;
rep *to* once ;
ch 5, and join to the 1st st.
Two motifs finished and joined as we work.
That has been easy hasn't it. But before you go, please read the notes below.
Now let's go and make as many as we need for the round waist. You need to make two pieces for the front that will equal to half round waist/hip measurement and one for the back that is the other half of the round waist/hip measurement.
For advanced crocheters : You can make one round strip that is the waist / hip measurement but remember that you will need to divide for armhole in a slightly different way.
After you have finished the tape for the base we will work on the lacy top portion.
If you have worked 2 fronts and one back, you will need to join all parts to finish.
If you have worked one continuous tape for front and back, then you need to divide for armholes a little differently as we work the top piece then in a continuous way.
So decide all of this now before you start on your base tape.
Once your base tape is done, let's continue with the pattern.
We will now work side to side in Rows and I'll continue numbering from Round 3.
Please note that if you are working two fronts and one back, you will repeat all these instructions three times
Row 4 :
Re-attach your yarn at the right side 1st dc ; dc in that same 1st dc ;
(ch 1, sk next dc, dc in the next dc) ;
rep (to) all the way to the end. Turn.
Double crochet 2-tog : dc 2-tog : [yo, insert hk in st or ch-sp, yo and pull up a lp ; yo and draw through 2 lps] 2 times (3 lps on hk) ;
{yo, draw through 2 lps on hk} 2 times. One dc 2-tog made.
This video tutorial at https://youtu.be/1_oPlUfN5eg shows you how to use the dc 2-tog to decrease. Row 5 :
dc 2-tog over the 1st dc and in the 1st ch-1 sp ;
dc in the same 1st ch-1 sp ;
*(dc 2-tog over the next dc and the next ch-1 sp ; dc in the same ch-1 sp) ;
rep (to) 4 times ;
dc 2-tog over the next dc and the next ch-1 sp ;
dc in the next dc* ;
rep *to* till last ch-1 sp ;
dc 2-tog over the last ch-1 sp and the last dc. Turn
Row 6 :
dc in the 1st dc ;
(ch 1, sk next dc, dc in the next dc) ;
*rep (to) 5 times ;
ch 1, sk next dc, dc 2-tog over the next 2 dc ;
ch 1, sk next dc, dc in the next dc* ;
rep *to* till the end. Turn.
Row 7 :
dc 2-tog over the 1st dc and in the 1st ch-1 sp ;
dc in the same 1st ch-1 sp ;
*(dc 2-tog over the next dc and the next ch-1 sp ; dc in the same ch-1 sp) ;
rep (to) 4 times ;
dc in the next dc ;
2 dc in the next ch-1 sp ;
rep (to) once* ;
rep *to* till last ch-1 sp ;
dc 2-tog over the last ch-1 sp and the last dc. Turn
You can choose to stop the motif base pattern at this point or repeat it one more time. We do need to replicate all these rows on the other side of the motif as well, which will all add to the length of the project. So I suggest you measure the length, calculate how much more we will get (by adding the rows on the other side) before you work the final 2 row repeats.
Row 8 :
Rep Row 6
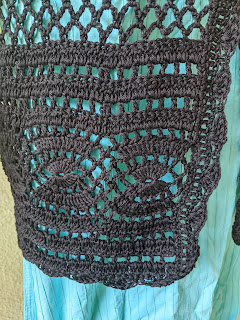
Now we need to replicate Rows 4 - 7 (or 9) on the other side of the motif too.
You can choose to work this part now, or carry on with the body pattern and work these rows at the end ;
OR work these rows now and then that becomes the body of the bolero.
Either way, I am going to give instructions for the body of the bolero, continuing numbering with Row 10.
OR you just stop here, start on the body of the top and have a scalloped finish for the base
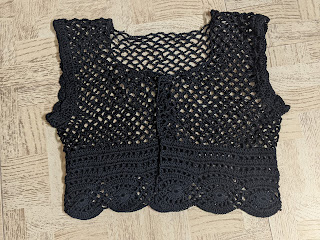
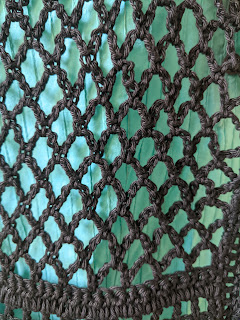
Row 10 :
sc in the 1st dc ;
(ch 5, sk next 2 dc, sc in the next dc) ;
rep (to) till the end. Turn
Row 11 :
dc in the 1st sc ;
ch 3, sc in the next ch-5 sp ;
(ch 5, sc in the next ch-5 sp) ;
rep (to) till the last ch-5 sp ;
ch 3, dc in the last sc. Turn
Row 12 :
sc in the 1st dc ;
ch 5, sk next ch-3 sp, sc in the next ch-5 sp
(ch 5, sc in the next ch-5 sp) ;
rep (to) till the last ch-5 sp ;
ch 5, sk next ch-3 sp, sc in the last dc. Turn
And that's our lacy pattern.
Rep Rows 11 - 12 till you reach the armhole, ending with Row 12.
The pattern is the same for the back
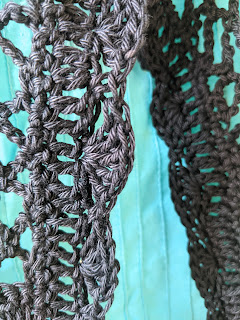
For the armhole shaping : I skipped 3 ch-5 sps (sl-st through them) ,
I then worked dc 2-tog over the next 2 ch-5 sps, and then worked Row 11 pattern. I repeated the dc 2-tog decrease once more along the armhole end and I had the shape I needed for my armhole. I then continued working without decrease till I reached the shoulders.
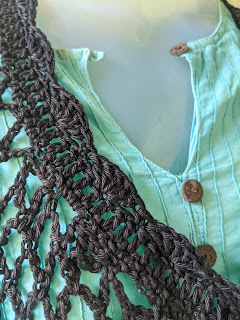
For the neckline shaping : The decrease idea is the same as we do for the armhole. You just need to keep in mind where you want to start shaping for neckline.


