AN EXQUISITE ROSE MOTIF and then some...
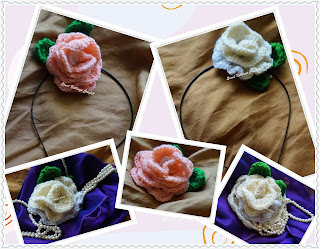
I have made rose motifs before, and am always on
the lookout for cute little motifs that can be used in a different set of ways.
I found this chart and it makes quite a large
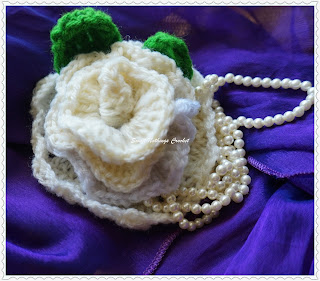
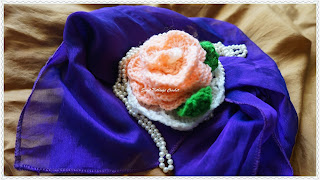
rose – so tweaking it just a bit, I made two roses .. smart eh? One chart, two
flowers.. well, three if you go the whole hog with the chart.. so let’s get
started.
Thank you for joining me.
In case you have just joined me, know that you can access all of my earlier creations by checking under ‘categories’ on the right hand side of this blog under “Labels”. Then, for your convenience, follow me here or on Facebook, You Tube, Pinterest, Twitter or Instagram.
Oh, and may I add that the fastest way to find any of my blogs is via Pinterest.
Do remember to add my blog URL when you make and show off your creation.
Cheers. Enjoy
Materials used : Today
I’ve used a little bit of our Indian Oswal Cashmilon acrylic 3-ply yarn with a
3 mm crochet hook
For Indians : I’d
also suggest using our Anchor knitting , Red rose , White Rose or Alize knitting
cotton yarns – and you can get all of this with an easy mouse click on the
top right hand side of this blog (read : Click here to buy yarns Online)
I used acrylic to match a dress I’ve made with
the same yarn – (and yes, hold your horses, I will upload the pattern for the
dress shortly). So do not worry about
the yarn – just get the pattern going.
Stitches used : Using US terminology
Starting slip knot : Here’s how you start with a slip knot. https://youtu.be/lJcqsVcs8cw
Starting slip knot 1 or the Sloppy Slip knot : This is a neat new way to start your work without a slip knot. https://youtu.be/YfC7KmGpifs
Magic circle : To refresh your skill, please view this easy video https://youtu.be/ISC39yOqWro
What is a chain stitch ? Here is an easy video tutorial https://www.youtube.com/watch?v=pXx5ukBjKkY
What is a slip stitch : Here is a neat video tutorial at https://youtu.be/weB3QNbA8Iw
Single Crochet : Sc : yo, insert hk into st ; yo (2 lps on hk); yo, draw through both lps. One sc made. Check out the video at https://youtu.be/ghACqBpA-3k
First stitch for Single Crochet : This is how I like to start my row of sc. Check out the video at https://youtu.be/6pVYRfsf4_M
Half Double Crochet : Hdc : yo, insert hk into st ; yo (3 lps on hk) ;
yo, draw through all 3 lps. One hdc made.
Check out the video at https://youtu.be/sDiELJdB2Dg
Chainless start for Half Double Crochet : I dislike the ch-2 start, and this is what I do to start my row of hdc. Check out the video at https://youtu.be/lWXpl1KdbZ8
Double Crochet : dc : yo, insert hk into st ; yo (3 lps on hk);
[yo, draw through 2 lps] twice. One dc made.
Check out the video at https://youtu.be/xdnjB27zpYo
Chainless start for Double Crochet : I dislike the ch-2 / ch – 3 start, and this is what I do to start my row of dc.
Check out the video at https://youtu.be/wskv3iTjRx0
Double crochet 4-tog as a decrease stitch : dc 4-tog : Here is an easy video tutorial for working a dc 4-tog over 4 sts at https://youtu.be/WjSNi7ithIU
Double crochet 4-tog as a decorative stitch : dc 4-tog : Here is an easy video tutorial for working a dc 4-tog all in the same stitch as a decorative stitch at https://youtu.be/_B0-ye0cClU
How to add beads : Check this video at https://youtu.be/EcpgMgBox8I
How to work with beads in crochet : Check out this video at https://youtu.be/yanbAnF_pr0
Abbreviations used : Using US terminology
sc : single crochet dc : Double crochet
ch : chain ch-sp : chain space
sp : space rep : Repeat
hk : hook lp (s) : loop(s)
yo : yarn over sl-st : slip stitch
dc 4-tog : Double crochet 4-together
Instruction information
For my earlier patterns on
headwear and little motifs, do visit me at https://shyamanivas.blogspot.in/2017/01/some-more-fun-curly-wurlies-scrunchies.html
1.
Small rose
Start with a fsc and a
chain in multiples of 2 + 1. Turn.
I started with a ch
of 39 fsc like in the chart.
(Oh, note that the pearls in the photo above are only for photographic value.
I have not used pearls in my rose)
For our following row, we will
use a “V”-st which is (dc ; ch 1, dc) all in the same st or ch-sp.
Row 1 : “V”-st
in the 1st fsc ;
*sk next fsc, “V”-st
in the next fsc* ;
rep *to* till
end. Turn.
For our following row, we will use a Shell stitch which is (2 dc ; ch 2, 2 dc) all in the same st or ch-sp.
Row 3 : sl-st in the 1st ch-1 sp , Shell stitch in the same 1st ch-sp ;
*Shell stitch in the next ch-1 sp* ;
rep *to* till end. Turn.
In our following
row, we will work 11 dc in the ch-2 sps of the Shell st all through.
Row 3 : sl-st
into the 1st Shell st , 11 dc in the 1st ch-sp and in
each Shell st ch-sp all through.
Fasten off and leave
a tail.
Now comes the fun
part. As you have been working the 11
dc, (which is a lot I know..) you will notice that it all starts getting frilly
and wonky.. but that just adds to the beauty of the flower – so don’t panic.
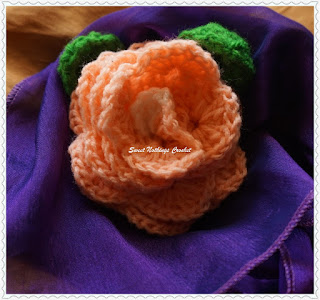
Now if you have made
a rose like this before, you know what do –
Basically you need to start rolling
the strip you’ve made and start attaching the
bottom of the flower together, and magically when you reach the end of
the rolled strip, you will have a beautiful rose ready to use!
Play with how loose or tight you want to keep
your roll, and you will get a different flower with each roll.
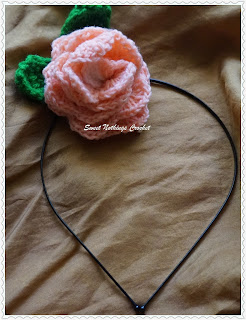
Now I am not sure
how you want to use this motif, so what I’d suggest is work a small loop at the
back of the motif. You can then either
thread this onto a ribbon / metal headband or use a small safety pin to attach
it onto the dress or cap.
For a slightly
larger flower, all we’re doing is adding one row.
2.
Slightly larger rose
Start with a fsc and a
chain in multiples of 2 + 1. Turn.
I started with a ch
of 39 fsc like in the chart.
For our following row, we will
use a “V”-st which is (dc ; ch 1, dc) all in the same st or ch-sp. Work a slightly loose ch-1 as we will need to
work a lot of sts into it
Row 1 : “V”-st
in the 1st fsc ;
*sk next fsc, “V”-st
in the next fsc* ;
rep *to* till
end. Turn.
For our following row, we will
use a Shell-st which is (2 dc ; ch 1, 2 dc) all in the same st or ch-sp.
We will work our Shell st in
the ch-1 sp of our “V”-st all through.
Row 2 : Shell-st
in the 1st “V”-st and in each
“V”-st till the end. Turn.
In our following
row, we will work 11 dc in the ch-1 sps of the Shell st all through.
Row 3 : sl-st
into the 1st Shell st , 11 dc in the 1st ch-1 sp and in
each Shell st ch-sp all through.
Fasten off and leave
a tail.
If you see the chart, there is
yet another rose you can make, adding another rows.. but that’s for another
day. For my cute little (well, not that
tiny) rose, this is as far as I’m headed today.
For the leaf, you can either
check out my earlier blog for an Irish crochet leaf at https://shyamanivas.blogspot.in/2017/03/irish-lace-leaf-pendant.html
OR here’s what I did for my
leaf here.
3.
Leaf motif - 1
Start with a 4
chain. Turn and work 3 more dc into the
4th ch from hk. Turn.
For this pattern, I've tweaked a little bit off the tiny doily pattern - as you may have guessed if you have worked that pattern from my blog before ;)
Row 1 : dc
in the 1st dc and the next 3 dc.
Turn.
In our following
row, we will work a dc 4-tog. For a “how
to” check the top of this blog for a link.
Row 2 : dc4-tog
over all 4 dc. Fasten off and leave a
long tail to attach the motif onto the base of the flower.
To make a slightly wider
leaf, work 4 dc (instead of 3), which means you will need to work a dc
5-tog. Once again, check the top of this
blog for a “how to”. You will also need
to work in all 5 dc from one end to the other (i.e Row 1 says work next 3 dc,
you will work in the next 4 dc)
For a slightly
longer leaf, just add one row, and ta da.. it groweth ! ;)
Start with a 4
chain. Turn and work 3 more dc into the
4th ch from hk. Turn.
Row 1 : dc
in the 1st dc and the next 3 dc.
Turn.
Row 2 : dc
in the 1st dc and the next 3 dc.
Turn.
In our following
row, we will work a dc 4-tog. For a “how
to” check the top of this blog for a link.
Row 3 : dc4-tog
over all 4 dc. Fasten off and leave a
long tail to attach the motif onto the base of the flower.
Once again, to make
a slightly wider and longer leaf, work 4 dc (instead of 3), which means you
will need to work a dc 5-tog. Of course I needn’t add that
in rows 1 and 2, you will work in all 5 dc end to end.
Double crochet 5-tog as a decrease stitch : dc 5-tog : Here is an easy video tutorial for working a dc 5-tog over 5 sts at https://youtu.be/Dh2viux_fBA
Double crochet 5-tog as a decorative stitch : dc 5-tog : Here is an easy video tutorial for working a dc 5-tog all in the same stitch as a decorative stitch at https://youtu.be/5806EIpgcV8
5.
.. and just a little something more
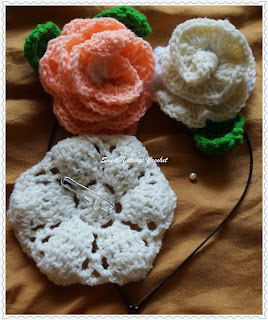
Oh, just for kicks I decided to
remake the little motif I’ve made before – a tiny tiny doily of sorts, which I
think will make a neat backdrop for the lovely flowers.. whatcha think? So head on over to https://shyamanivas.blogspot.in/2017/01/some-really-cute-toy-furniture-4.html
for the doily pattern.
Remember that you can either
attach all your motifs off one to another, OR you can work that lil loop.. Read
through this blog again if you don’t know what I mean by ‘lil loop’ ;)
And that’s done.. yet another set
of exquisite projects brilliantly executed !
Enjoyed this ?? I sure did..come back right here
for more freebie patterns
I’d appreciate if you could credit my blog (and
link the original pattern link) when you make your own creation. Thanks.
If you're visiting me here for the first time, and have liked the experience, do add me to your mailing list (for your convenience) , and all my future free patterns will come straight to your mail box.
I’d appreciate if you could credit my blog (and link the original pattern link) when you make your own creation. Thanks.
Check out my awesome pins on Pinterest at https://in.pinterest.com/shyamanivas/
OR just my free patterns at https://in.pinterest.com/shyamanivas/free-patterns-made-by-me/
Join me on YouTube at http://youtube.com/shyamanivas
And on my Facebook page at https://www.facebook.com/Sweet-Nothings-Crochet/ for more patterns.
Do follow me on Twitter https://twitter.com/ShyamaNivas
Do follow me on Instagram https://www.instagram.com/sweetnothingscrochet/
Find me on Ravelry at ravelry.com/projects/shyamanivas/
Do also visit me at http://www.craftsy.com/user/2573073/pattern-store?_ct=cx-buvjdql&_ctp=my-pattern-store,manage
Have a great day and see you soon.







No comments:
Post a Comment
Thanks for taking the time to stop by. Do tell me what you think. Cheers