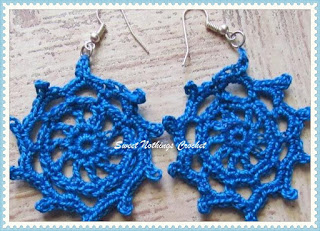
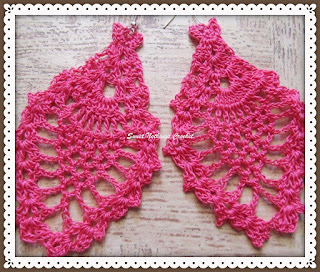
HANGING CIRCLES EAR RING
I guess you’re as fascinated with
the jewellery craze as I am.. but this was yet one that I just could not
resist.. A set of tiny little motifs that all join up to make this dangly
hanging ear ring.. how smart is this? Right?!
So welcome back as we work on this
new challenge together.
Thank you for joining me.
In case you have just joined me, know that you can access all of my earlier creations by checking under ‘categories’ on the right hand side of this blog under “Labels”. Then, for your convenience, follow me here or on Facebook, You Tube, Pinterest, Twitter or Instagram.
Check out all my social media handles at the bottom of this blog
Oh, and may I add that the fastest way to find any of my blogs is via Pinterest.
All my blogs can be printed. Find the printer friendly (green) link at the bottom of this blog. You can also hit Control P (or Command P for Mac) on your keyboard, and the blog will go directly to the connected printer.
Remember that you only print if absolutely essential. Save paper – Save Our Earth.
Do remember to add my blog URL when you make and show off your creation.
Just copy the link on the search bar above - that's the blog URL.
To purchase this or similar yarn online, click here to buy your yarns online via Amazon. While you will still pay the same, I may get paid by Amazon as well.
This is a free blog - so do pay it forward for me. Cheers.
I was inspired by this photograph
and have used the charts (well, part of anyway) to make my project.
General yarn info : The yarn used today is not specific to this pattern.
You can use any yarn with a suitable hook to make this project to any size.
International yarns : Among the international yarns I have used in this thickness, I’d suggest Aunt Lydia Cotton 10, Aunt Lydia Bamboo-Viscose 10, DMC Petra, Sullivans knitting cotton (Australia), Milford Soft, Hilaza Rustica Eclat , Alize cotton yarn and Alize bamboo yarn.
Skill level: Intermediate
Abbreviations used : (Using U.S terminology)
lp(s) : Loop(s) hk : Hook
dc : Double crochet sp : Space
sl-st : Slip stitch ch : Chain
st(s) : Stitch(es)
yo : Yarn Over
Single Crochet : Sc : yo, insert hk into st ; yo (2 lps on hk); yo, draw through both lps. One sc made. Check out the video at
https://youtu.be/ghACqBpA-3k
Double Crochet : dc : yo, insert hk into st ; yo (3 lps on hk);
[yo, draw through 2 lps] twice. One dc made.
Chainless start for Double Crochet : I dislike the ch-2 / ch – 3 start, and this is what I do to start my row of dc.
Instructions using U.S terminology
Please note that I start all my rows with a ch 1, turning chain for ease.
Please check the top of this blog for easy video tutorials on all stitches used in today's pattern. For your convenience there video tutorials through the blog too
This ear ring will hang
straight off an ear ring hook.
The chart
here shows three sets of hanging circles.
I’ve opted to use two out of these three patterns.
Hanging Circle 1
We will make the first few
rounds of the circle, and on the very last round, we will join it to the loop
of your ear ring hook. (Chart right on top, in case you want to follow that as well)
Start with a magic circle and 10 sc in that circle.
Join with a sl-st to the 1st
sc.
Round 1 : dc in the 1st sc ;
*ch 1, dc in the next sc* ;
rep *to* all around till the
end.
Join with a sl-st to the 1st
st.
Round 2 : sc in the 1st dc ;
*2 sc in the next ch-1 sp ; sc
in the next dc* ;
rep *to* all around and join
with a sl-st to the 1st sc.
Round 3 : sc in the 1st sc ;
*ch 4, sk next 2 sc, sc in the
next sc* ;
rep *to* all around and join
with a sl-st to the 1st sc.
In our following last round, we
will work a decorative picot.
We will use a ch-3 picot, which
is (ch 3, sl-st into the 3rd ch from hk).
In this round, we will also
join our first little hanging circle to the ear ring hook.
Round 4 : sl-st in the 1st sc ;
*(2 sc + picot + 2 sc) all in
the next ch-4 sp ; sl-st in the next sc* ;
rep *to* till the last ch-4 sp
;
[2 sc ; ch 1, join to the ear ring loop ;
ch 1 , sl-st in the last sc ; 2
sc] all in the last ch-4 sp ;
and join with a sl-st to the 1st sc.
Fasten off and weave in ends ..
glue in ends as well.
Congratulations. You have one tiny
little hanging circle ear ring ready.
If
you decide to hang the second circle off this one, carry on with the
instructions – else slip on your ear ring and take a selfie now. Remember to tag me on Facebook :)
Hanging Circle 2
We will make the first few
rounds of the circle, and on the very last round, we will join it to the picot
of the earlier circle. (Chart right on top, in case you want to follow that as well)
Start with a magic circle and 12 sc in that circle.
Join with a sl-st to the 1st sc.
Round 1 : dc in the 1st sc ;
*ch 1, dc in the next sc* ;
rep *to* all around till the
end.
Join with a sl-st to the 1st
st.
Round 2 : sc in the 1st dc ;
*ch 5, sk next dc, sc in the
next dc* ;
rep *to* all around till the
end.
Join with a sl-st to the 1st st.
Round 3 : sl-st into the 1st ch-5 sp ; 5 sc in the same
ch-5 sp ;
*sk next sc, 5 sc in the next ch-5
sp* ;
rep *to* all around till the
end.
Join with a sl-st to the 1st st.
In our following last round, we
will work a decorative picot.
We will use a ch-3 picot, which
is (ch 3, sl-st into the 3rd ch from hk).
In this round, we will also
join our first little hanging circle to the earlier hanging circle.
Round 4 : sl-st in the 1st sc ;
*sc + picot in the next sc ;
[dc + picot + dc] all in the next
sc ;
sc + picot in the next sc ; sl-st in the next 2 sc* ; rep *to* all around
till the 5 sc ;
sl-st in the next sc ; *sc +
picot in the next sc ;
[dc + ch
1 , join to the picot of the earlier hanging circle ; ch 1 + dc] all in
the next sc ; sc + picot in the next sc ;
sl-st in the next 2 sc and join
with a sl-st to the 1st st.
Fasten off and weave in ends…
and glue in ends as well again.
And that’s done.. yet another
project brilliantly executed !
Enjoyed this ?? I sure did..come
back right here for more freebie patterns
If you're visiting me here for the first time, and have liked the experience, do add me to your mailing list (for your convenience) , and all my future free patterns will come straight to your mail box.
I’d appreciate if you could credit my blog (and link the original pattern link) when you make your own creation. Thanks.
Have a great day and see you soon.
..and some miscellaneous home use projects
I have a few jewellery pieces
already made, and just in case
you want a dekho at those free patterns … here you go


No comments:
Post a Comment
Thanks for taking the time to stop by. Do tell me what you think. Cheers