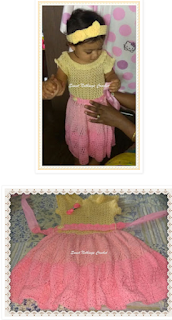
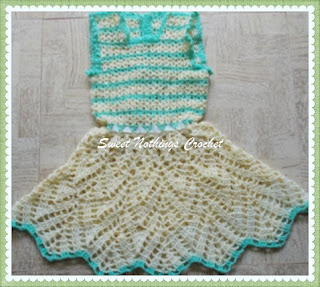
You can make this dress to suit any size, using any yarn / hook
you want.
Just ensure that you get the stitch count right, and you've got
a beautiful baby dress.
For this creation, we will start from the yoke, and work up to the
shoulders.
We will then go back to that first yoke row and work down for
the skirt portion.
dc in the next 7 fsc ; 2 dc in next fsc
;
(ch 2, 2 dc in same fsc
;
dc in next 11 fsc ; 2 dc in next fsc) ;
dc in the next 17 fsc ;
rep from (to) once ;
dc till the end. Turn.
If you've placed markers, remove all markers.
Note : The
(2 dc ; ch 2, 2
dc) marks the corner and we will work this (to) every time in the ch-2 sp for each corner
If you are using any other count start,
ensure that you get the (to) in each corner. Remember that each corner
has this pattern going along, no matter what your stitch count for the
stitches in between corners.
Round 3 : dc
in the 1st 2 dc ;
(ch 1, sk next dc, dc in
next dc) ;
rep from (to) twice ;
*ch 1, dc in ch-2 sp ;
ch 2, dc in same ch-2 sp ; dc in next dc ;
rep from (to) 7 times ;
ch 1, dc in next dc* ;
rep from *to* twice ;
ch
1, dc in ch-2 sp ;
ch 2, dc in same ch-2 sp ; dc in next dc
;
rep from (to) 3 times ;
dc in last dc. Turn.
Round 4 : dc
in the 1st 2 dc ;
(dc in next ch-1 sp, dc in next dc) ;
rep
from (to) 3 times ;
*2 dc in next ch-1 sp ;
ch 2, 2 dc in same ch-2
sp ; dc in next dc ;
rep from (to) 10 times* ;
rep from *to* twice ;
2 dc in ch-2 sp ;
ch 2,
2 dc in same ch-2 sp ;
dc in next dc ;
rep from (to) 4 times ;
dc in last dc. Turn.
Rep Rows 3 and 4, ending
with Row 4 , till you have a yoke of length ~ 3.75 - 4” and width of
9.5-10”.
After completion of yoke and
before starting on the skirt portion, I did 2 rows of sc for placket along the
back edge, ensuring I made the ‘eye-holes’ for my buttons on one side, and
then joined the placket at the bottom edge, so it is now easier to
calculate stitches for start of skirt portion.
I prefer to start my
dress projects from the centre back as you can work in a neat placket thereafter. For younger children, I prefer to make a larger opening - all the way to waist if needed.
Do remember that the
first row we need to close up the armhole opening - so when you reach the
corner ch-2 sps, you will do one half of the corner st in one ch-2 sp, and the
other half in the other ch-2 sp (i.e assuming you are in the back portion ch-2
sp, and we’re working on a 2dc pair st, you will have one half of the pair in
the back portion, and the next dc in the front half)
The stitch count for our skirt is in
multiples of 8.
So on completion of your yoke, please see that you have multiples of 8 to start. We will work in rounds for the skirt portion of the dress.
Our "V"-st is (dc ; ch 1, dc) all in the same st or ch-sp.
Round 1 : “V”-
st in the 1st st ;
ch 1, sk next 3 sts, (1 dc ; ch 2, 3 dc) in
the next st ;
*ch 1, “V”- st in the
next st ;
ch 1, sk next 3 sts, (1 dc ; ch 2, 3 dc) in the next st* ;
rep from *to* till
end.
Join with sl-st to the 1st st.
Round 2 : sl-st
into the 1st “V” st, “V”- st in the 1st st ;
ch
1, (3 dc, ch 2, dc) in the next ch-2 sp ;
*ch 1, “V”- st in the
next “V” st ;
ch 1, (3 dc, ch 2, dc) in the next ch-2 sp* ;
rep
from *to* till end.
Join with sl-st to the 1st st.
Round 3 : sl-st
into the 1st “V” st, “V”- st in the 1st st ;
ch
1, (1 dc ; ch 2, 3 dc) in the next ch-2 sp ;
*ch 1, “V”- st in the
next “V” st ;
ch 1, (1 dc ; ch 2, 3 dc) in the next ch-2 sp* ;
rep from *to* till
end.
Join with sl-st to the 1st st.
Round 5 : sl-st
into the 1st “V” st, “V”- st in the 1st st
;
ch 1, (1 dc ; ch 2, 4 dc)
in the next ch-2 sp ;
*ch 1, “V”- st in the
next “V” st ;
ch 1, (1 dc ; ch 2, 4 dc) in the next ch-2 sp* ;
rep from *to* till
end.
Join with sl-st to the 1st st.
Round 6 : sl-st
into the 1st “V” st, “V”- st in the 1st st
;
ch 1, (4 dc ; ch 2, dc)
in the next ch-2 sp ;
*ch 1, “V”- st in the
next “V” st ;
ch 1, (4 dc ; ch 2, dc) in the next ch-2 sp* ;
rep from *to* till
end.
Join with sl-st to the 1st st.
Round 7 : Rep
Round 5
Round 8 : Rep
Round 6
I am sure you’ve got the
pattern now.. every four lines, you’re adding one dc to the group, and every
alternate round you’re moving your group of stitches from one side to the
other.
Basically we will rep
Rounds 5 & 6 – note that the increases have been
indicated by the designer with a darker dc as are the increases in the chains
(the first ch increase coming in Round 9).
And here’s the full
chart .
So you’re all set to
continue now.
Work till you have the length of dress needed.
Right at the bottom there is a border, so check the pattern and if you are
going to work that border in, then work 2 rows less (as that's our
border) than full length needed.
And can you believe it.. you’re done ! Great job !
So as usual, fasten off, weave in
ends.. add a set of buttons around the back and beautify with a lovely satin
ribbon !
Wow ! This one was a quick project and I’ve really enjoyed making it –
hopefully so have you.
So ciao, and see you
soon.. in the next blog. Have a good day too


No comments:
Post a Comment
Thanks for taking the time to stop by. Do tell me what you think. Cheers