In case you have just joined me, know that you can access all of my earlier creations by checking under ‘categories’ on the right hand side of this blog under “Labels”.
How labels work : All patterns under a similar label can be found together so when you click on the label for say "crochet baby dress pattern", all my baby dress patterns are available - so scroll down to the very bottom and click on "Older Posts" to move onto the next post in the series. Before you reach that you have several other ways to find my blogs including blog links at the bottom of this blog
For your convenience, follow me here or on Facebook, You Tube, Pinterest, Twitter or Instagram.
Oh, and may I add that the fastest way to find any of my blogs is via Pinterest and if you are looking for more children wear then come here
All my blogs can be printed. Find the print friendly (green) link on the right of this blog. You can also hit Control P (or Command P for Mac) on your keyboard, and the blog will go directly to the connected printer.
Remember that you only print if absolutely essential. Save paper – Save Our Earth.
Do remember to add my blog URL when you make and show off your creation.
Just copy the link on the search bar above - that's the blog URL.
To purchase this or similar yarn online, click the highlighted links below to buy your yarns online via Amazon. While you will still pay the same, I may get paid by Amazon as well. This is a free blog - so do pay it forward for me. Cheers.
What did I do differently?
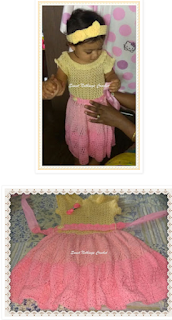
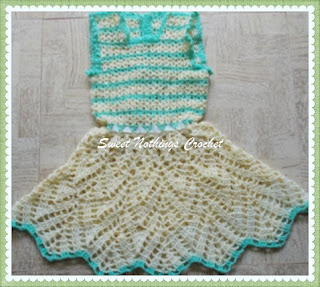
I changed the pattern of the yoke a bit and added flare for the skirt portion
For the yoke check the link given at the top of this blog for general sizes for neck sizing. That will give you an estimate of how many stitches you need to start with.
(Cadenas = stitches / meses = months / anos = years)
I am going to give you an idea of what to do with these numbers when working our yoke for your baby dress.
First, you will place your markers to mark the four corners as per the stitch count needed for your dress size. At these points, you will work the corner stitch of (2 dc ; ch 2, 2 dc). At each corner, you will work the (to) in the ch-2 sp of the earlier corner st. So that's the corners sorted.
For the body pattern, you will work all dc one row (working your corner stitches as given above). Every other row, to get that little 'peep-hole' pattern, you will work as follows
Alternate row : sc in the 1st dc ; (ch 2, sk next 2 dc, sc in the next sc) ; rep (to) all the way to the end. Turn.
Note : You may not have a proper (to) each row. It does not matter. In case you run out of a st at the end, just work all sc in the last few sts. Ensure that you 'try' to keep the pattern going. If your peep hole effect does not come exactly one on top of the other, it does not matter - you just create a slightly off-key holey lacy effect... and that's something different you have.
Now for the row that follows your peep hole row, you will work a dc in every st and a corner st in every corner. With every ch-2 sp, you will work 2 dc and you will work a dc in each sc. Easy enough. Go ahead and make a lovely yoke for a beautiful dress.
As I was making this for a 2-yr old, I wanted more of a flare to the dress – and so I just added more stitches on the first round of the dress (just after yoke) ensuring I kept the stitch count and multiples requirement. That way I increased the start stitch number and got a beautiful flare to the dress.


No comments:
Post a Comment
Thanks for taking the time to stop by. Do tell me what you think. Cheers